
Tl;dr: Etherscan is like Google – but for the Ethereum blockchain! Use this powerful database to get detailed information on your Ethereum wallet, track Web3 transactions safely and securely, detect any suspicious activities, protect yourself from Web3 scams, view NFTs, and manage your Dapp connections.
What is Etherscan?
Etherscan is an organization with a mission to provide fair and equal access to human readable blockchain data. Blockchain data can be less than easy to understand or obtain without certain technical knowledge. Etherscan seeks to provide everyone access to this data with their leading ‘BlockChain Explorer’, Search, API, and Analytics platform for the Ethereum network 🔥
What makes Etherscan really cool is that it’s a free tool, available to anyone, with dozens of advanced search functionalities: useful for beginner, intermediate, and advanced users alike!
Learning the basic features of Etherscan is pretty quick (we’ll cover top features in this post).

How to use Etherscan? Etherscan’s Top Notable Features
The nice thing about crypto is that everything is supposed to be transparent and easily-verifiable on a blockchain. Right? But how do you actually view what is going on, in a simple, straightforward way?
Enter Etherscan 😎 💪
Think of Etherscan like a search tool on steroids, but specifically for the Ethereum network. It’s like a combined ‘Google for crypto’ and domain service mixed with cool analytics and tools, and allows you to search for and verify transaction IDs, as well as dozens of other functionalities.
Some of the most popular things to do on Etherscan include:
- Check what’s in a wallet – With Etherscan, you’re able to look up the assets (including ERC 20 tokens and NFTs) for any Ethereum wallet address.
- Check the status of a transaction – You can confirm the status of any transaction on the Ethereum blockchain. For example, if you want to confirm an NFT you bought is in your wallet, you’ll be able to track the transaction – and even view it!
- Use the Gas Tracker – You can use this feature to see changes in gas prices in real-time. Gas fees are the transaction costs you pay to get your Ethereum transaction approved, and they can get pretty costly.
- Use the Token Ignore List feature to hide tokens and prevent them from contributing to your wallet address balance on Etherscan
- Stay up to date – Generally read Ethereum ecosystem news, analyze major events, and stay on top of what’s happening in the Ethereum blockchain.
The Etherscan team has been busy and they’ve also developed some new cool features ⚡:
- View NFTs – Etherscan has also launched an early-version of an NFT display UI, so that now you can view your NFTs directly on their site and review properties of the asset.
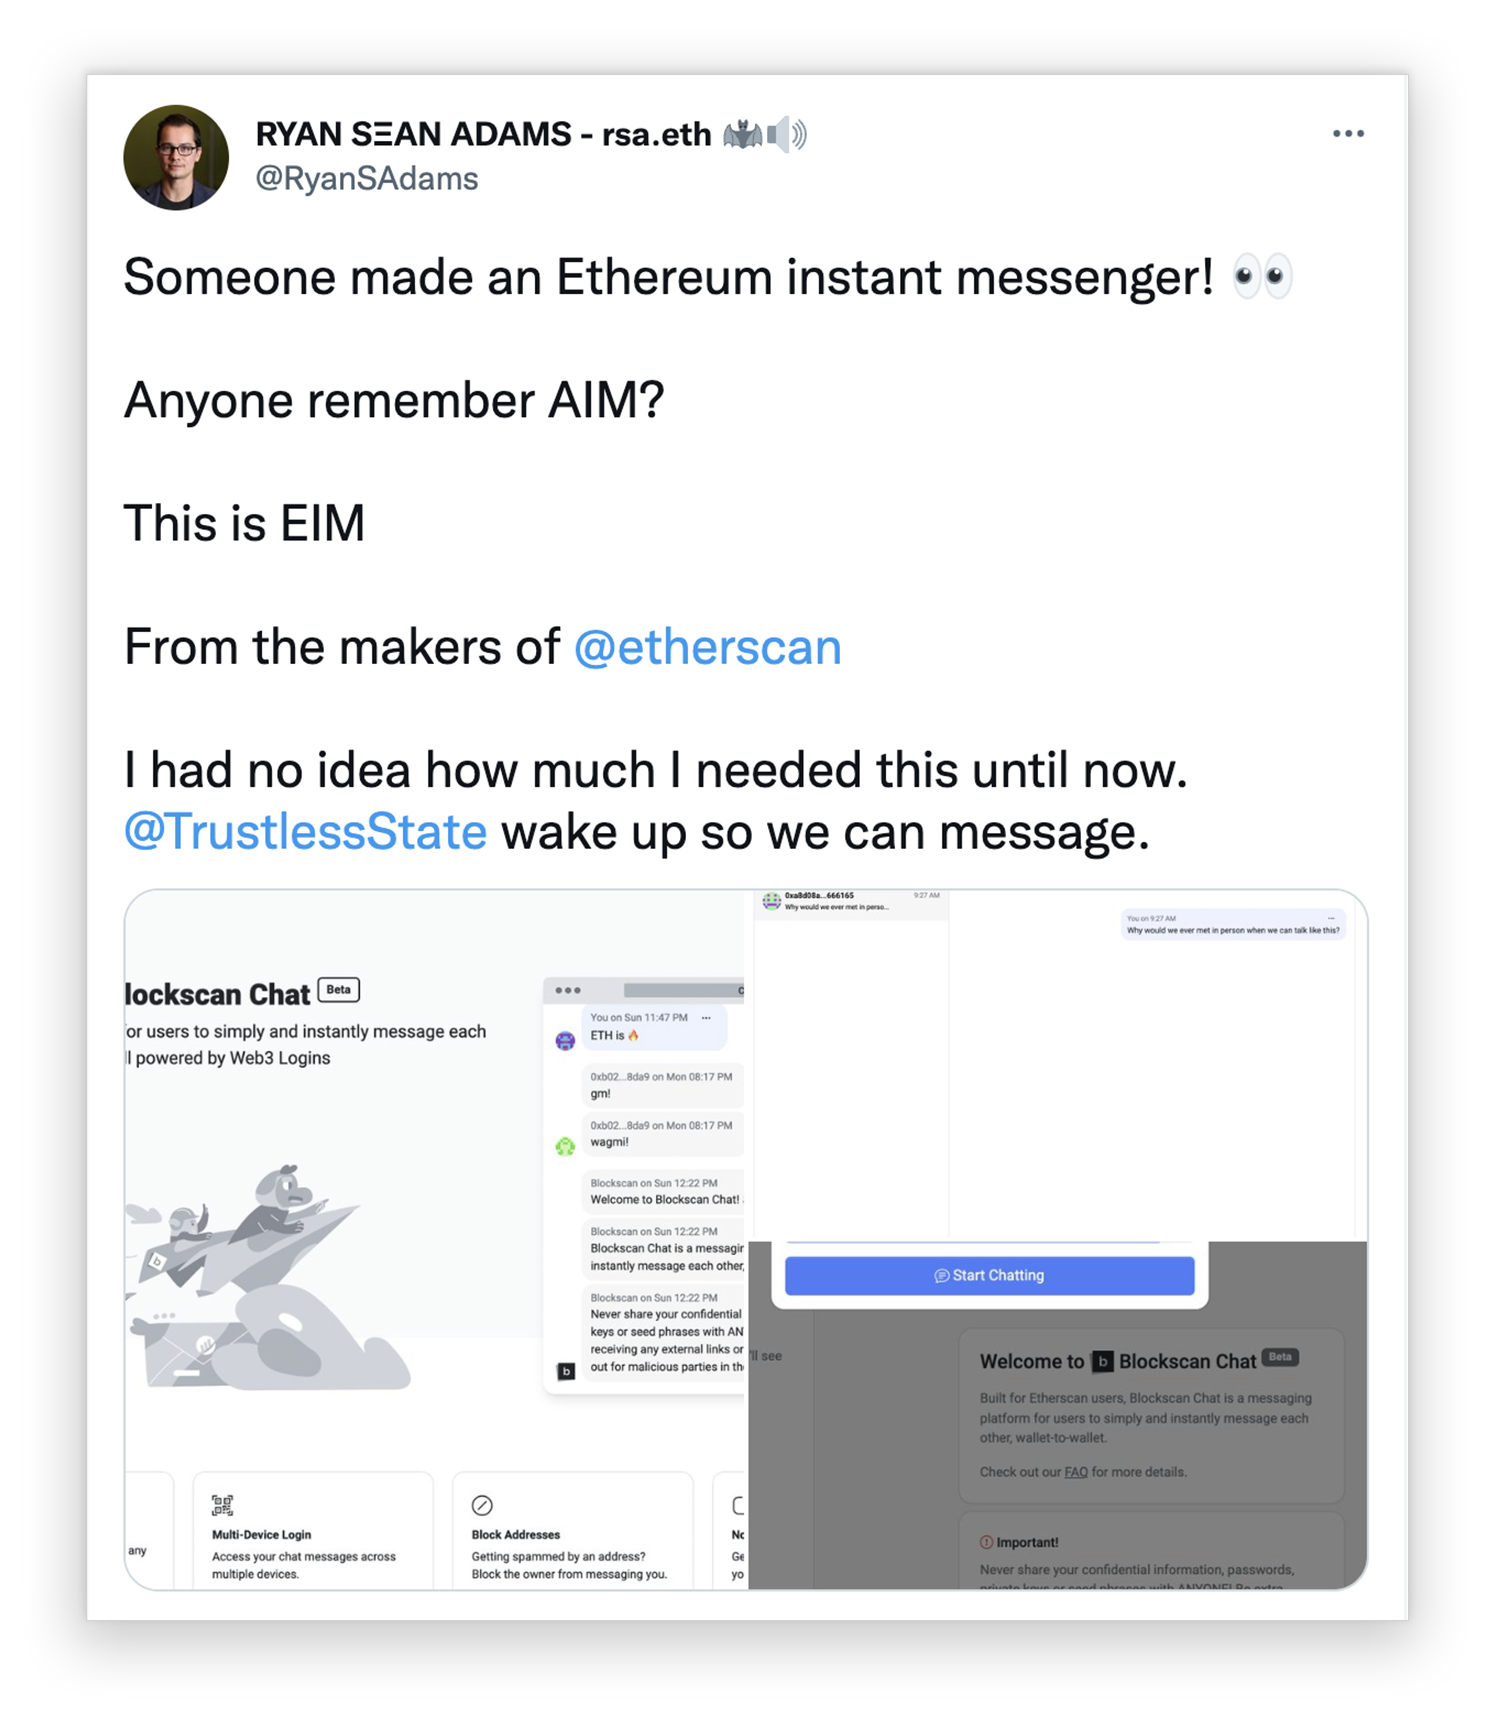
- Direct chat with other Ethereum users – The Etherscan team has developed an Ethereum instant messenger called Blockscan Chat, a messaging platform for users to simply and instantly message each other wallet-to-wallet. It’s like AIM, except “This is EIM”! (@RyanSAdams) 😅 This is a super handy feature, and even means you’ll be able to direct chat with any NFT owner!
These are just a few of the ways you can get started with Etherscan. Now let’s walk through the top 5 Etherscan tools you should know how to use 💪
Using Etherscan: 5 Essential Tools
Tool #1: How to look up a transaction on Etherscan 💸
When you initiate a crypto transaction (like sending Ether (ETH) from your cryptowallet to someone else, receiving an ERC-20 token, or receiving an NFT), you can use Etherscan to track the transaction ✅
To look up any transaction on Etherscan:
➡️ First, find the transaction hash or transaction ID (TXID). The TXID is a unique string of letters and numbers that identifies a transaction on the Ethereum blockchain.
➡️ Copy the transaction hash/ID
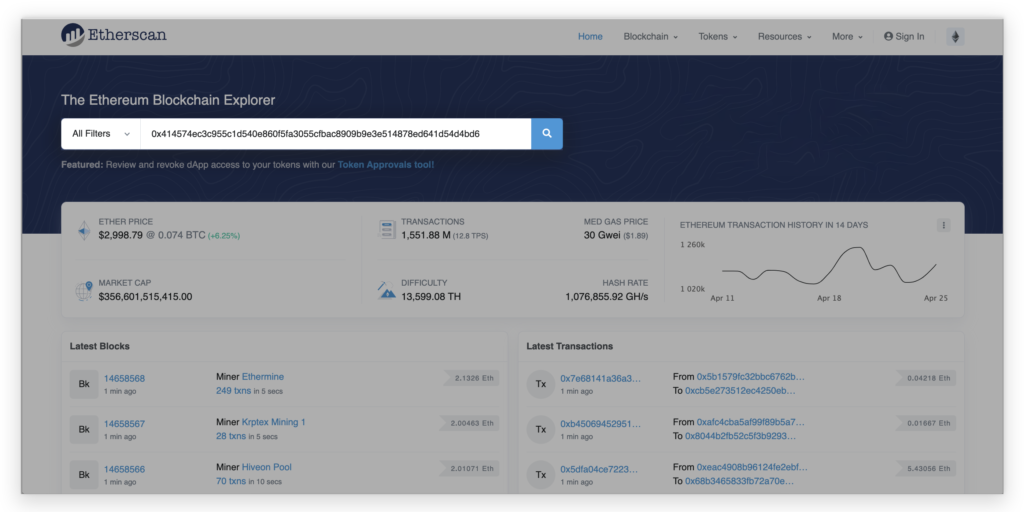
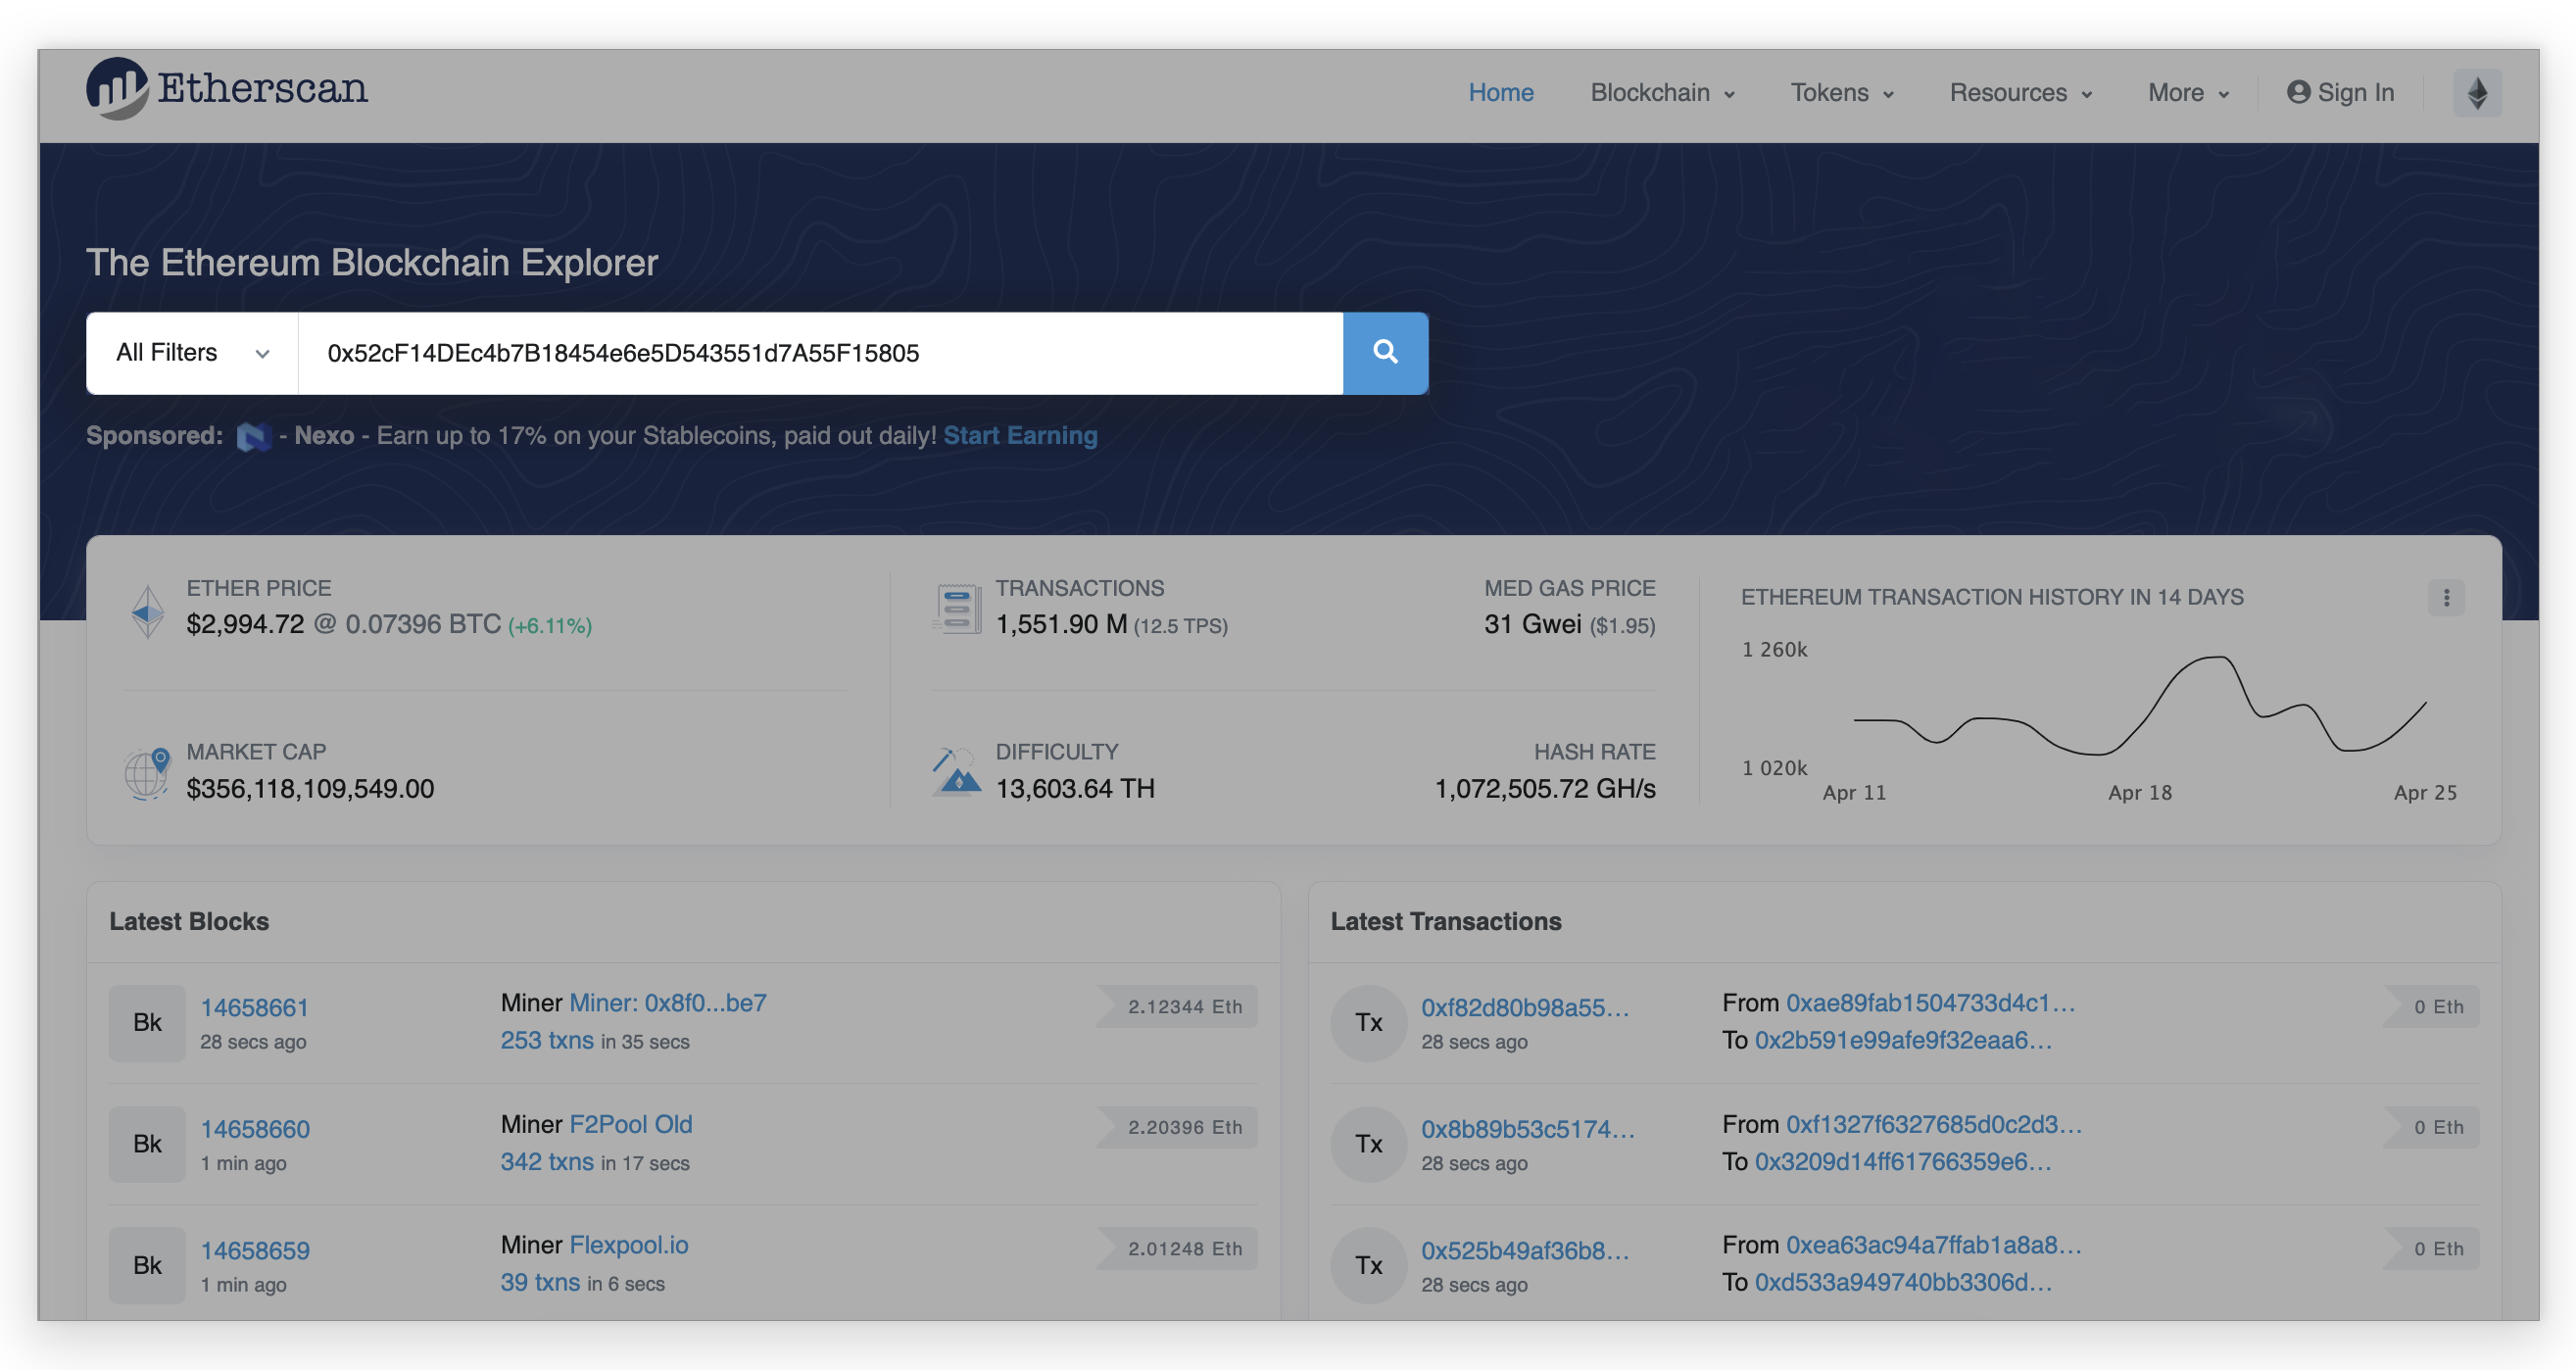
➡️ Open the Etherscan homepage
➡️ In the search field at the top of the page, copy/paste the TXID ‘hash’ and hit the ‘search’ icon.
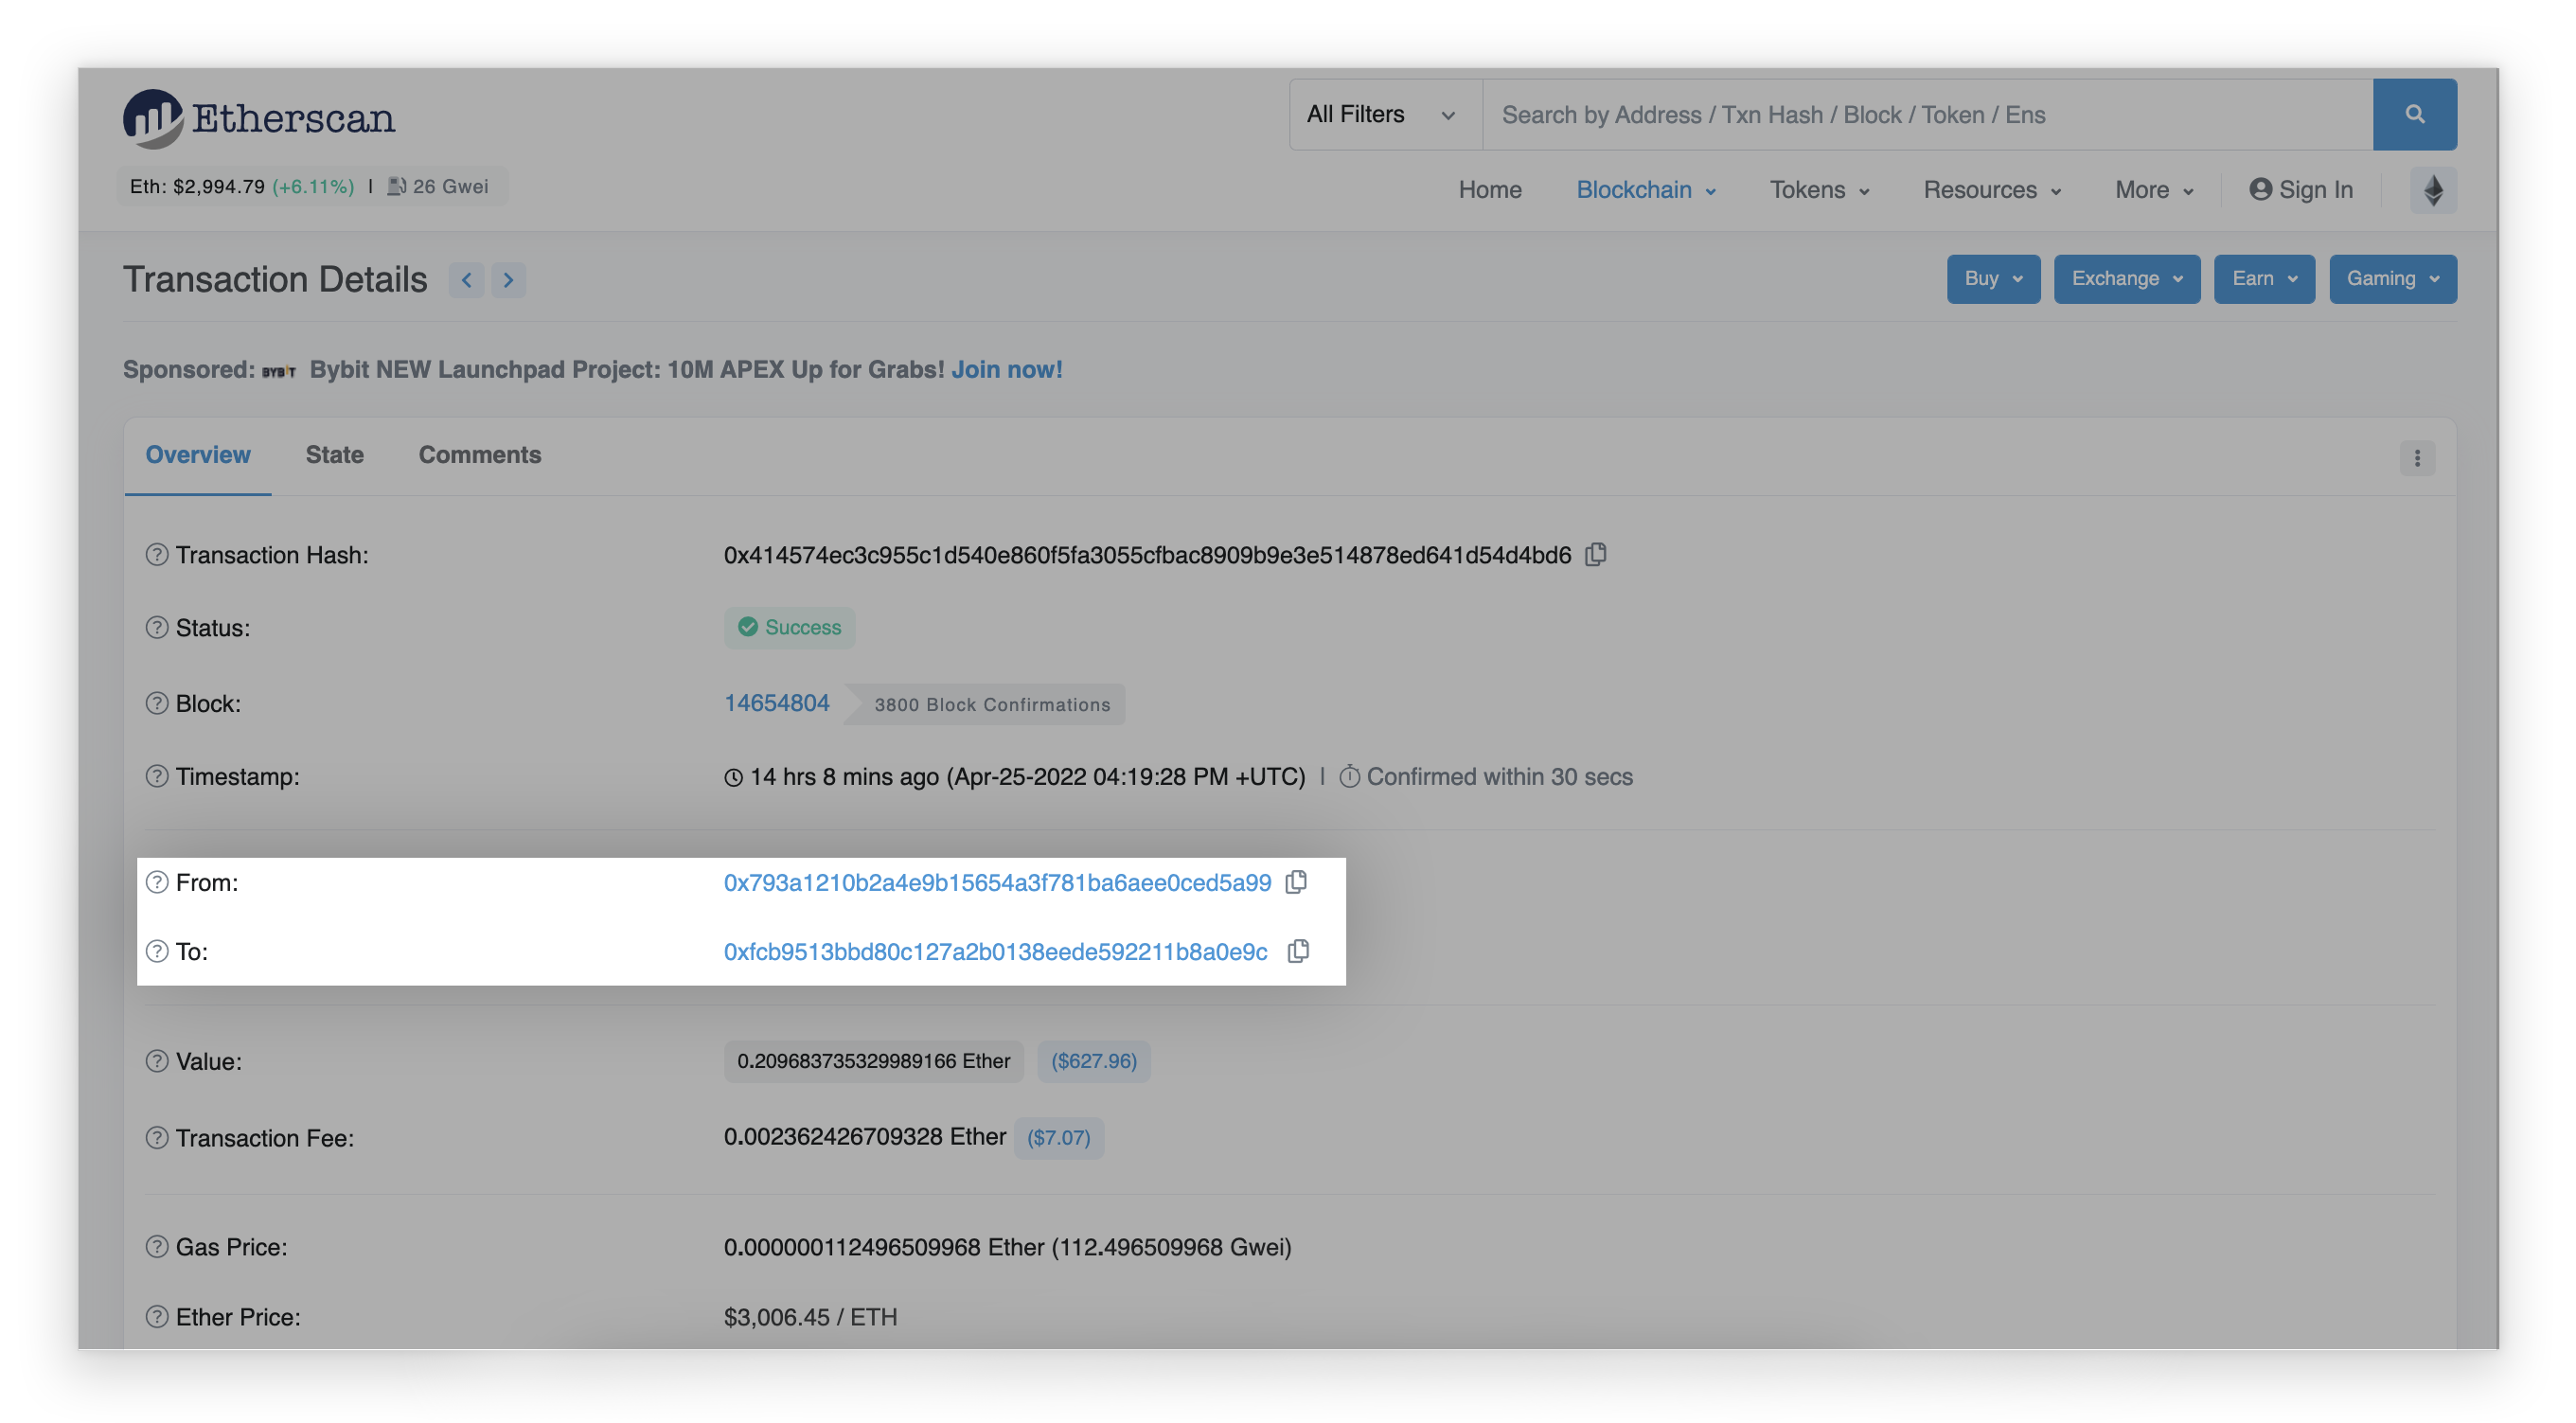
➡️ Now, you can review the details regarding a specific transaction! Here, we can see that approximately .209 ETH (about $627 USD was sent from one Ethereum wallet to another Ethereum wallet 💪
Now, let’s check out the receiving wallet to see what’s in there.
➡️ Click on the receiving wallet’s address (the “To”) to learn everything about the wallet! What’s inside, what was sent and received, when, and much more!
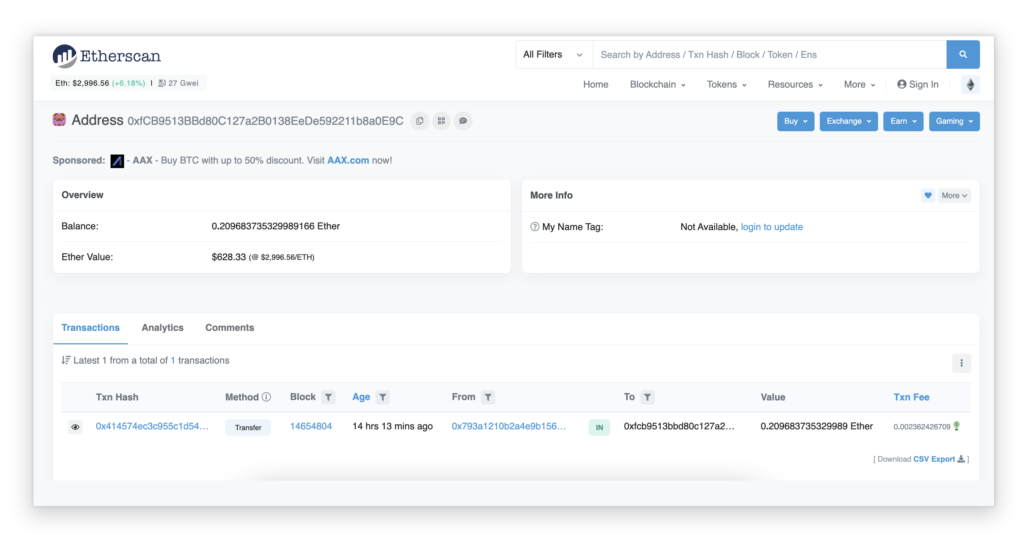
➡️ Here, we see the receiving wallet from the previous transaction it is now .209 ETH richer 😀
Click on a specific transaction to see detailed information such as:
- Status – Success, Pending, Failed
- Block – the number of the block in which the transaction was recorded
- Age – when the transaction was mined
- From / To – who the transaction was sent from (sender) and to (recipient)
- Value – transaction size
- Txn Fee – gas price
Bonus Tip: To look up an Etherscan transaction on Zengo:
If you used the Zengo app to buy or sell cryptocurrency, or you want to see your overall Ethereum balance and ERC 20 tokens, you can copy your TXID from the app to learn more about the transaction inside of Etherscan.
➡️ Open Zengo and go to your Ethereum wallet. When you scroll to the bottom, you’ll see all of your transaction history.
➡️ Tap on a transaction you want to learn more about, and you’ll see the status screen.
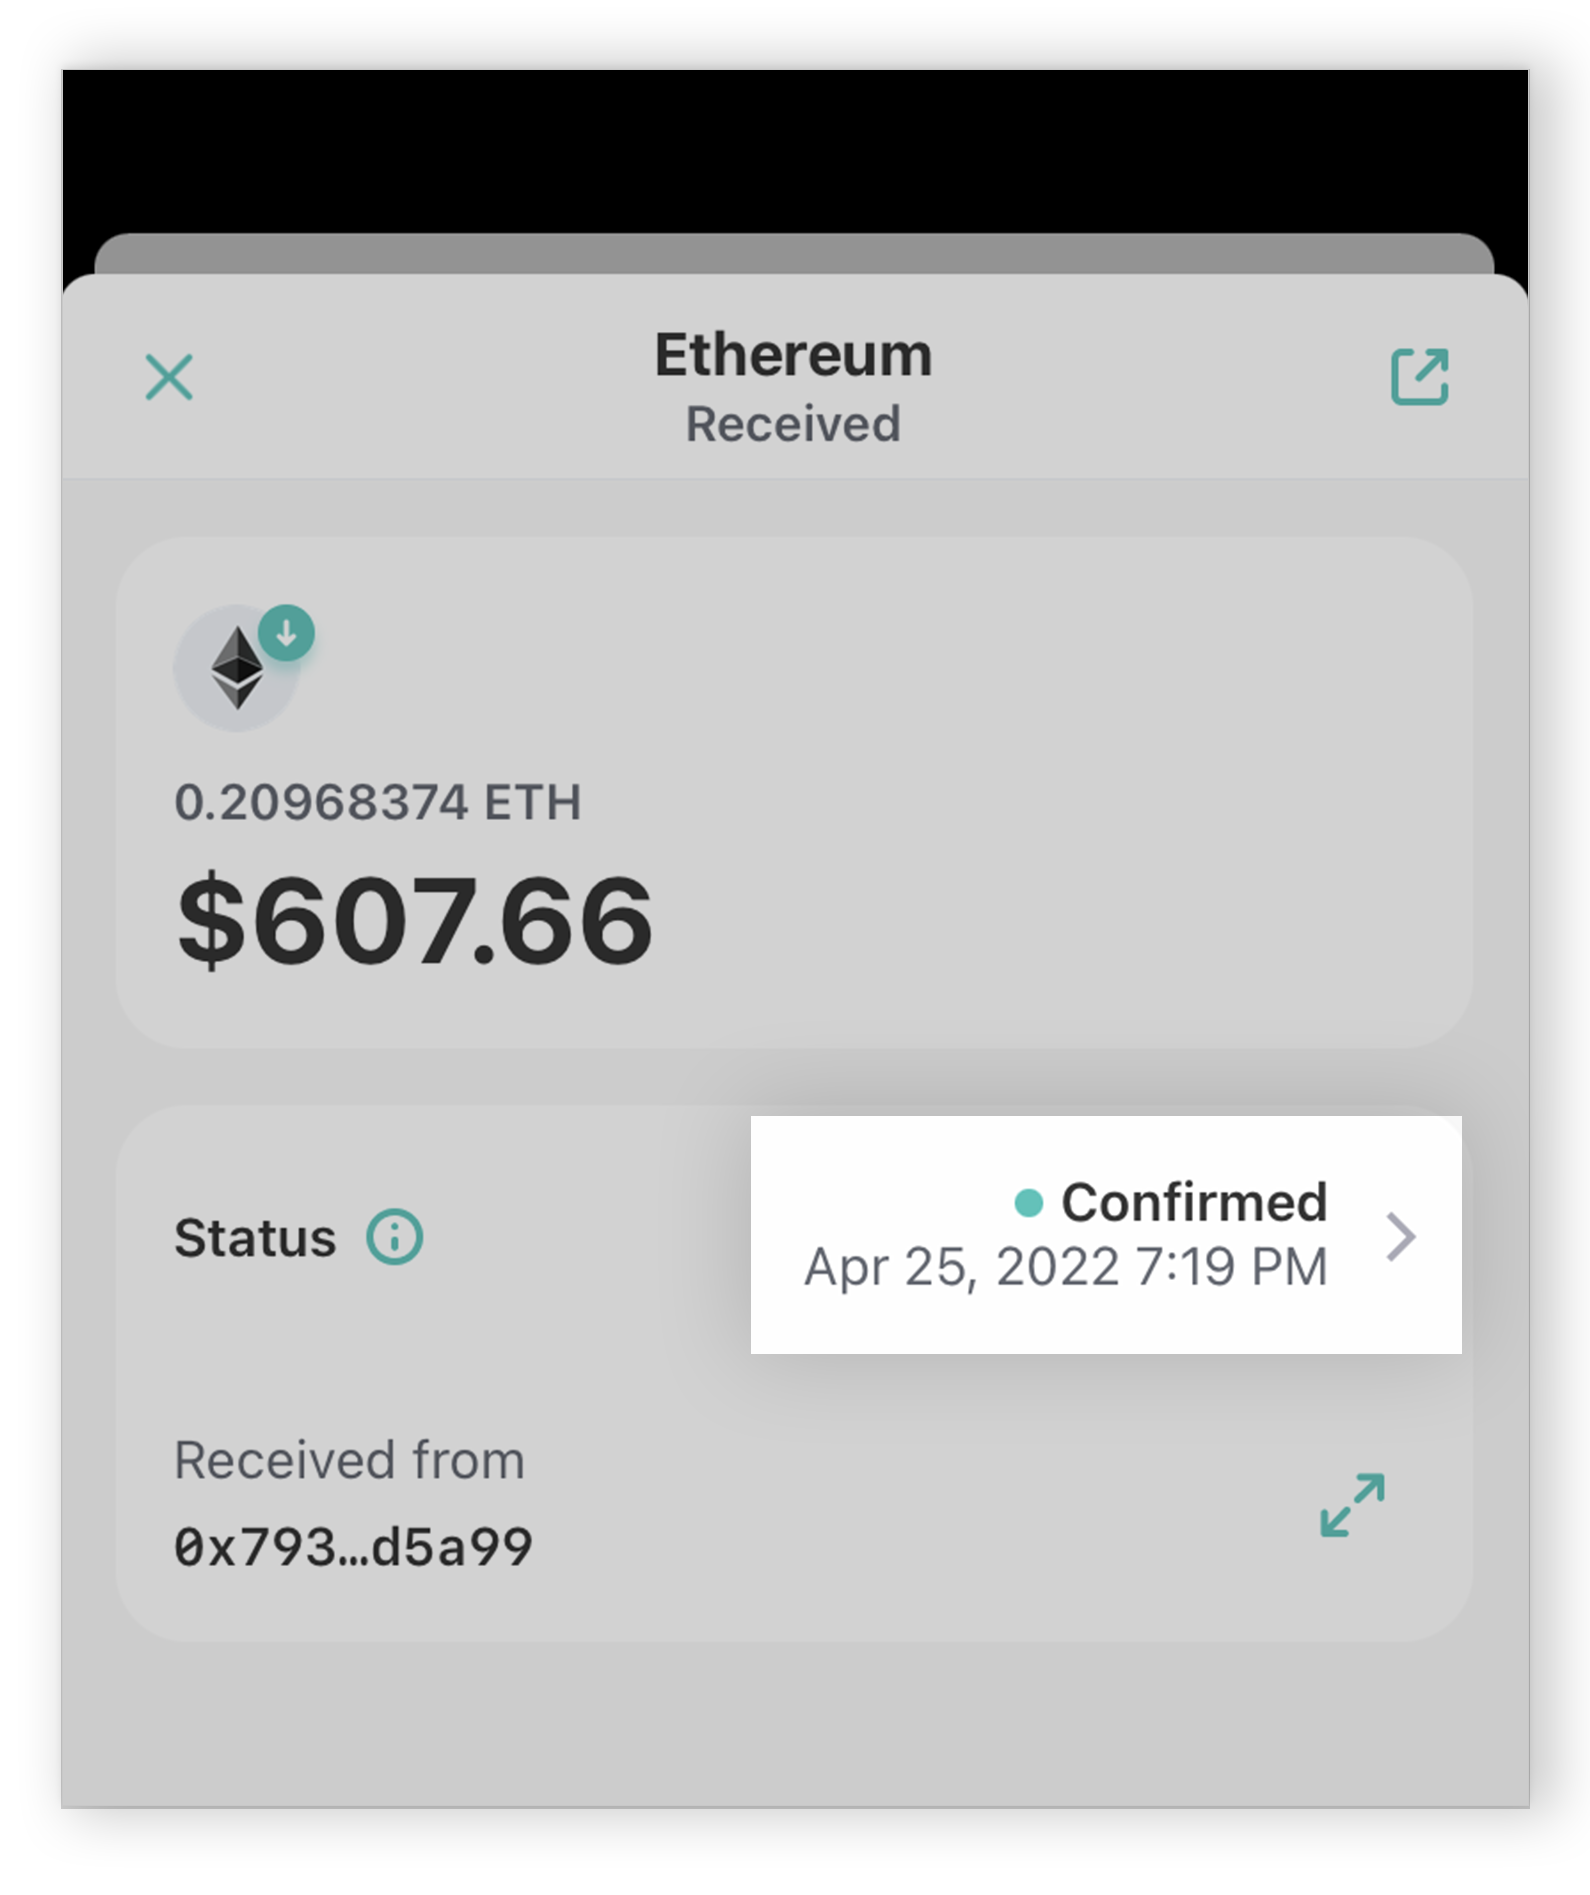
➡️ Here, it looks like you received some Ether (ETH)! Let’s learn more about this transaction. ➡️ Tap on “Confirmed” to view the transaction hash/ID on Etherscan.
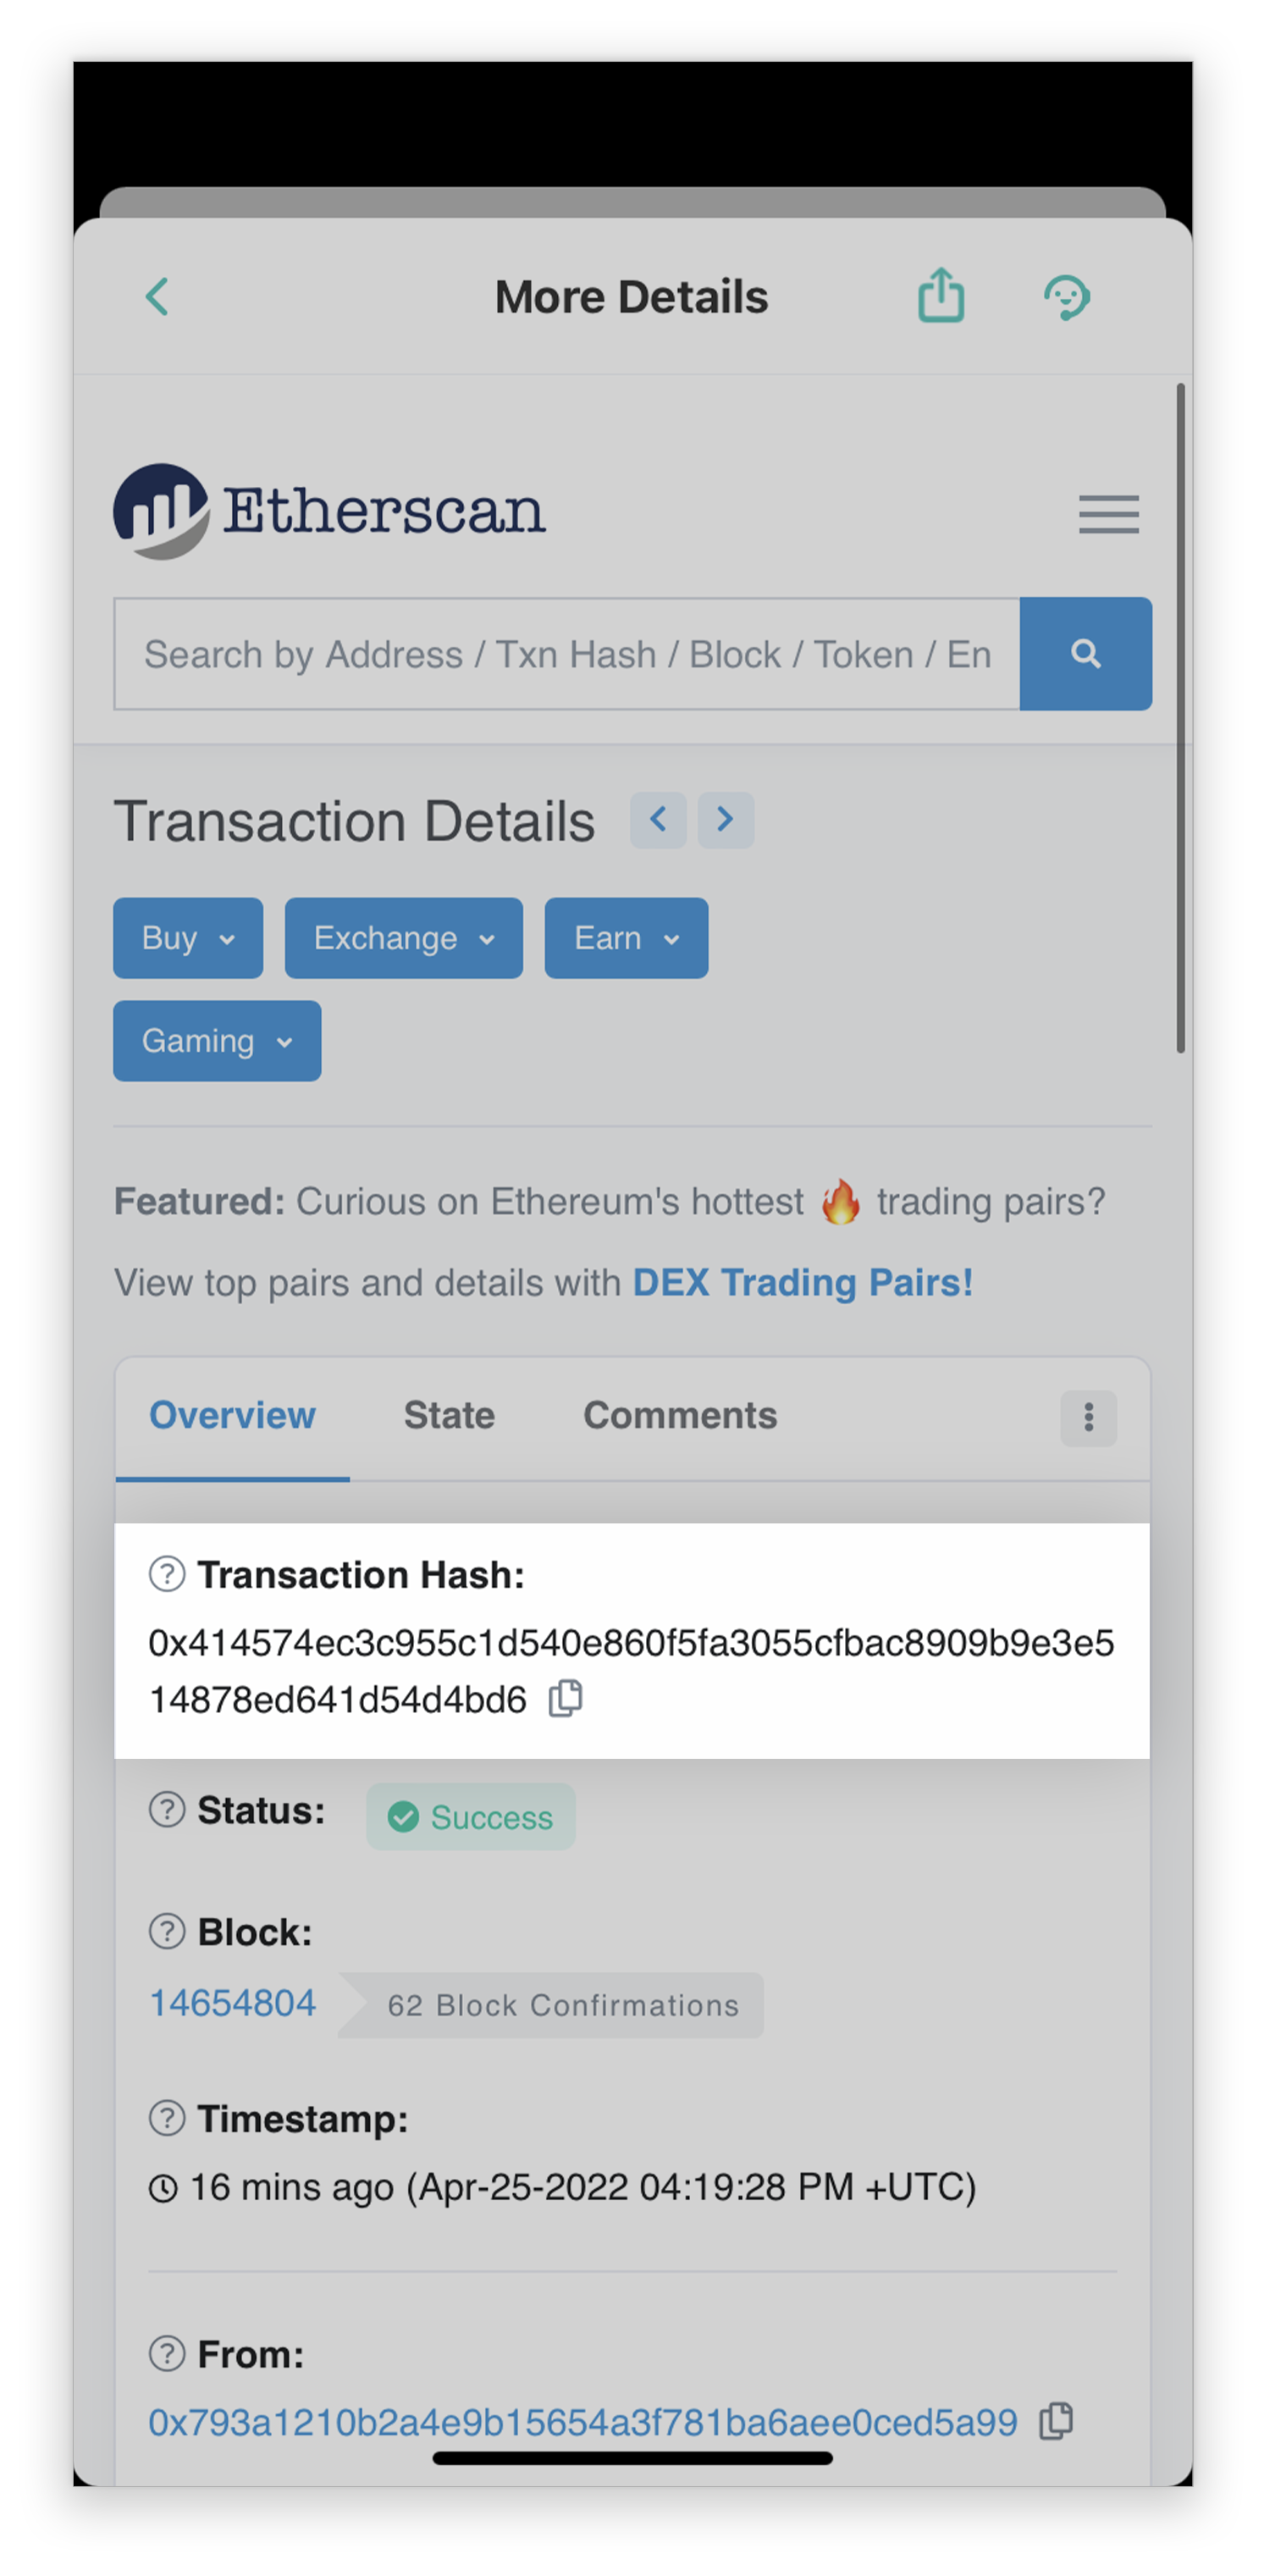
➡️ Here is the transaction on Etherscan! You can see the transaction ID highlighted (sometimes referred to as the transaction ‘hash’ (TXID). The TXID is a unique string of letters and numbers that identifies a transaction on the Ethereum blockchain.
➡️ If you want to share this ID with the person who sent you the ETH, they can also look it. upon Etherscan to confirm transaction status 💪
Tool #2: How to look up a wallet on Etherscan 🔍
With Etherscan, you’re able to look up any Ethereum wallet address and check what digital assets (including ERC 20 tokens and NFTs) are in the wallet. This is a useful feature for when you’re sending crypto and want to verify your receiving address – but also, it’s just plain ‘ol interesting for the snoopy snoops out there! The power of blockchain transparency is that you can look up anyone’s wallet and see what they’re holding 🤠
To do this, you’ll follow similar steps to Tool #1 above:
Open the Etherscan homepage and in the search field at the top of the page, copy/paste the relevant wallet address and hit the ‘search’ icon.
You’ll be able to see the page for the relevant wallet, including the list of all transactions associated with that Ethereum address.
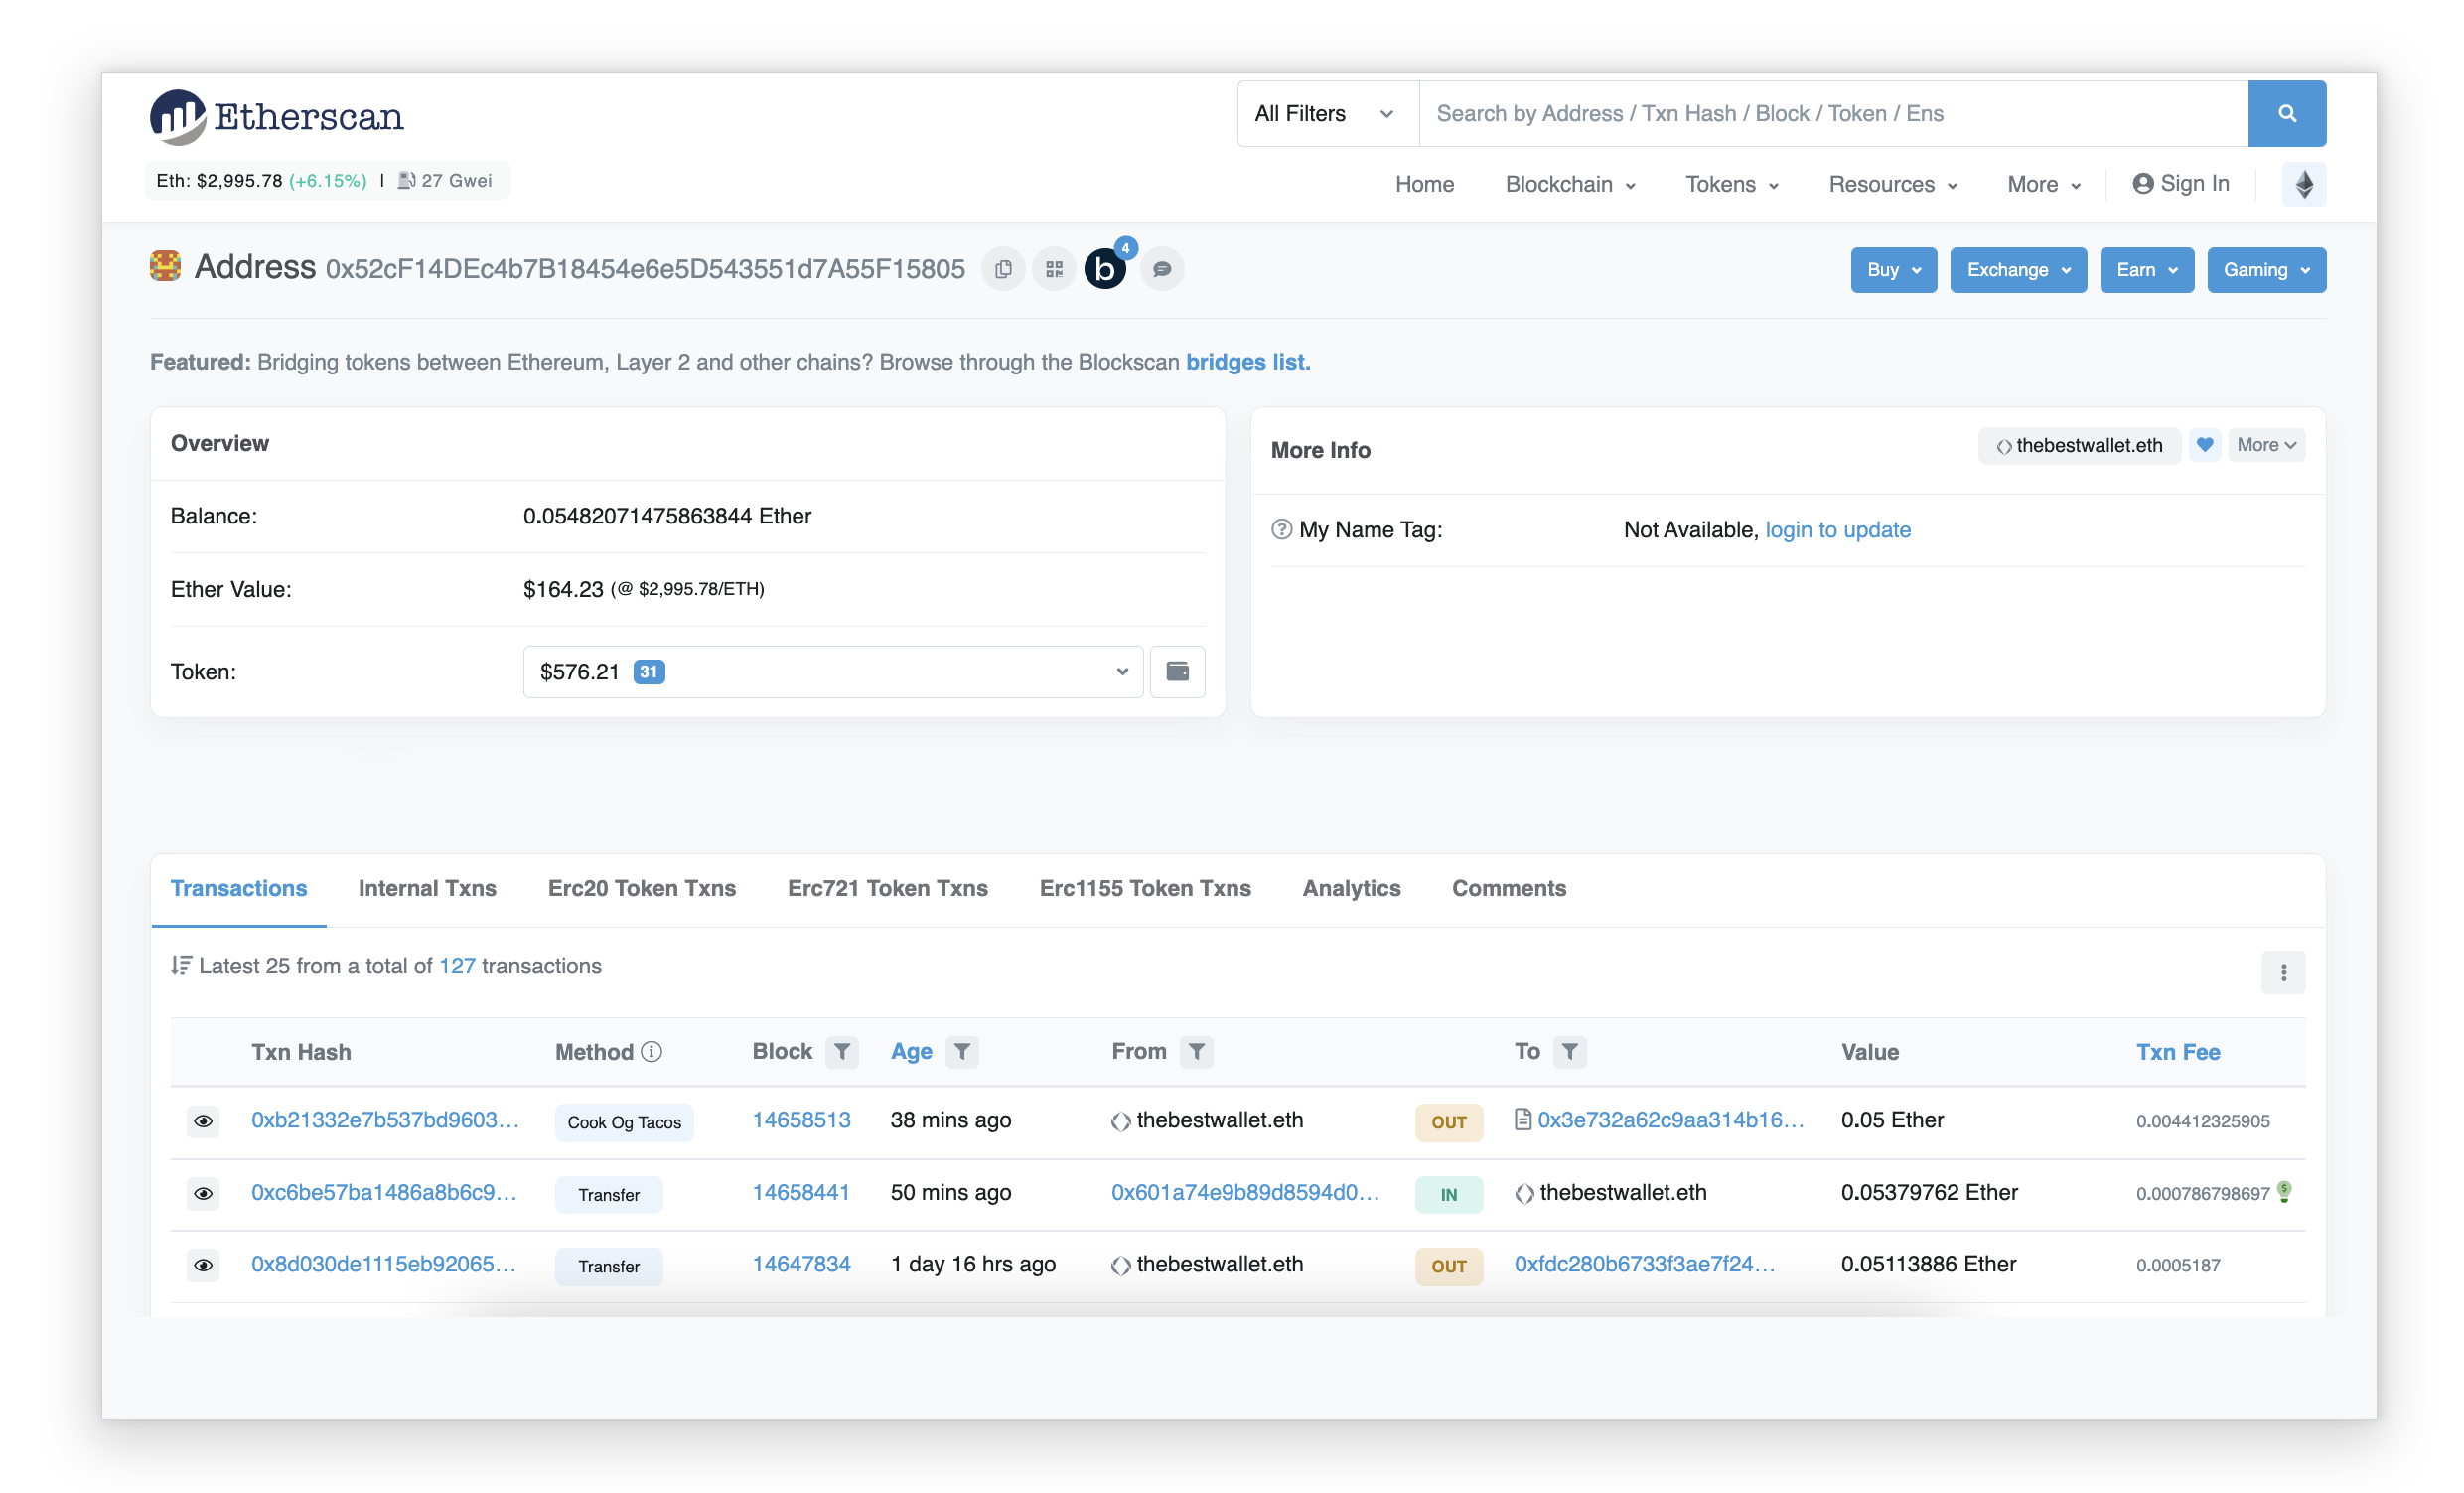
Fun tip: Click ‘Analytics’ to see detailed info for a full picture of the user’s activity, such as the user’s balance and transfer history!
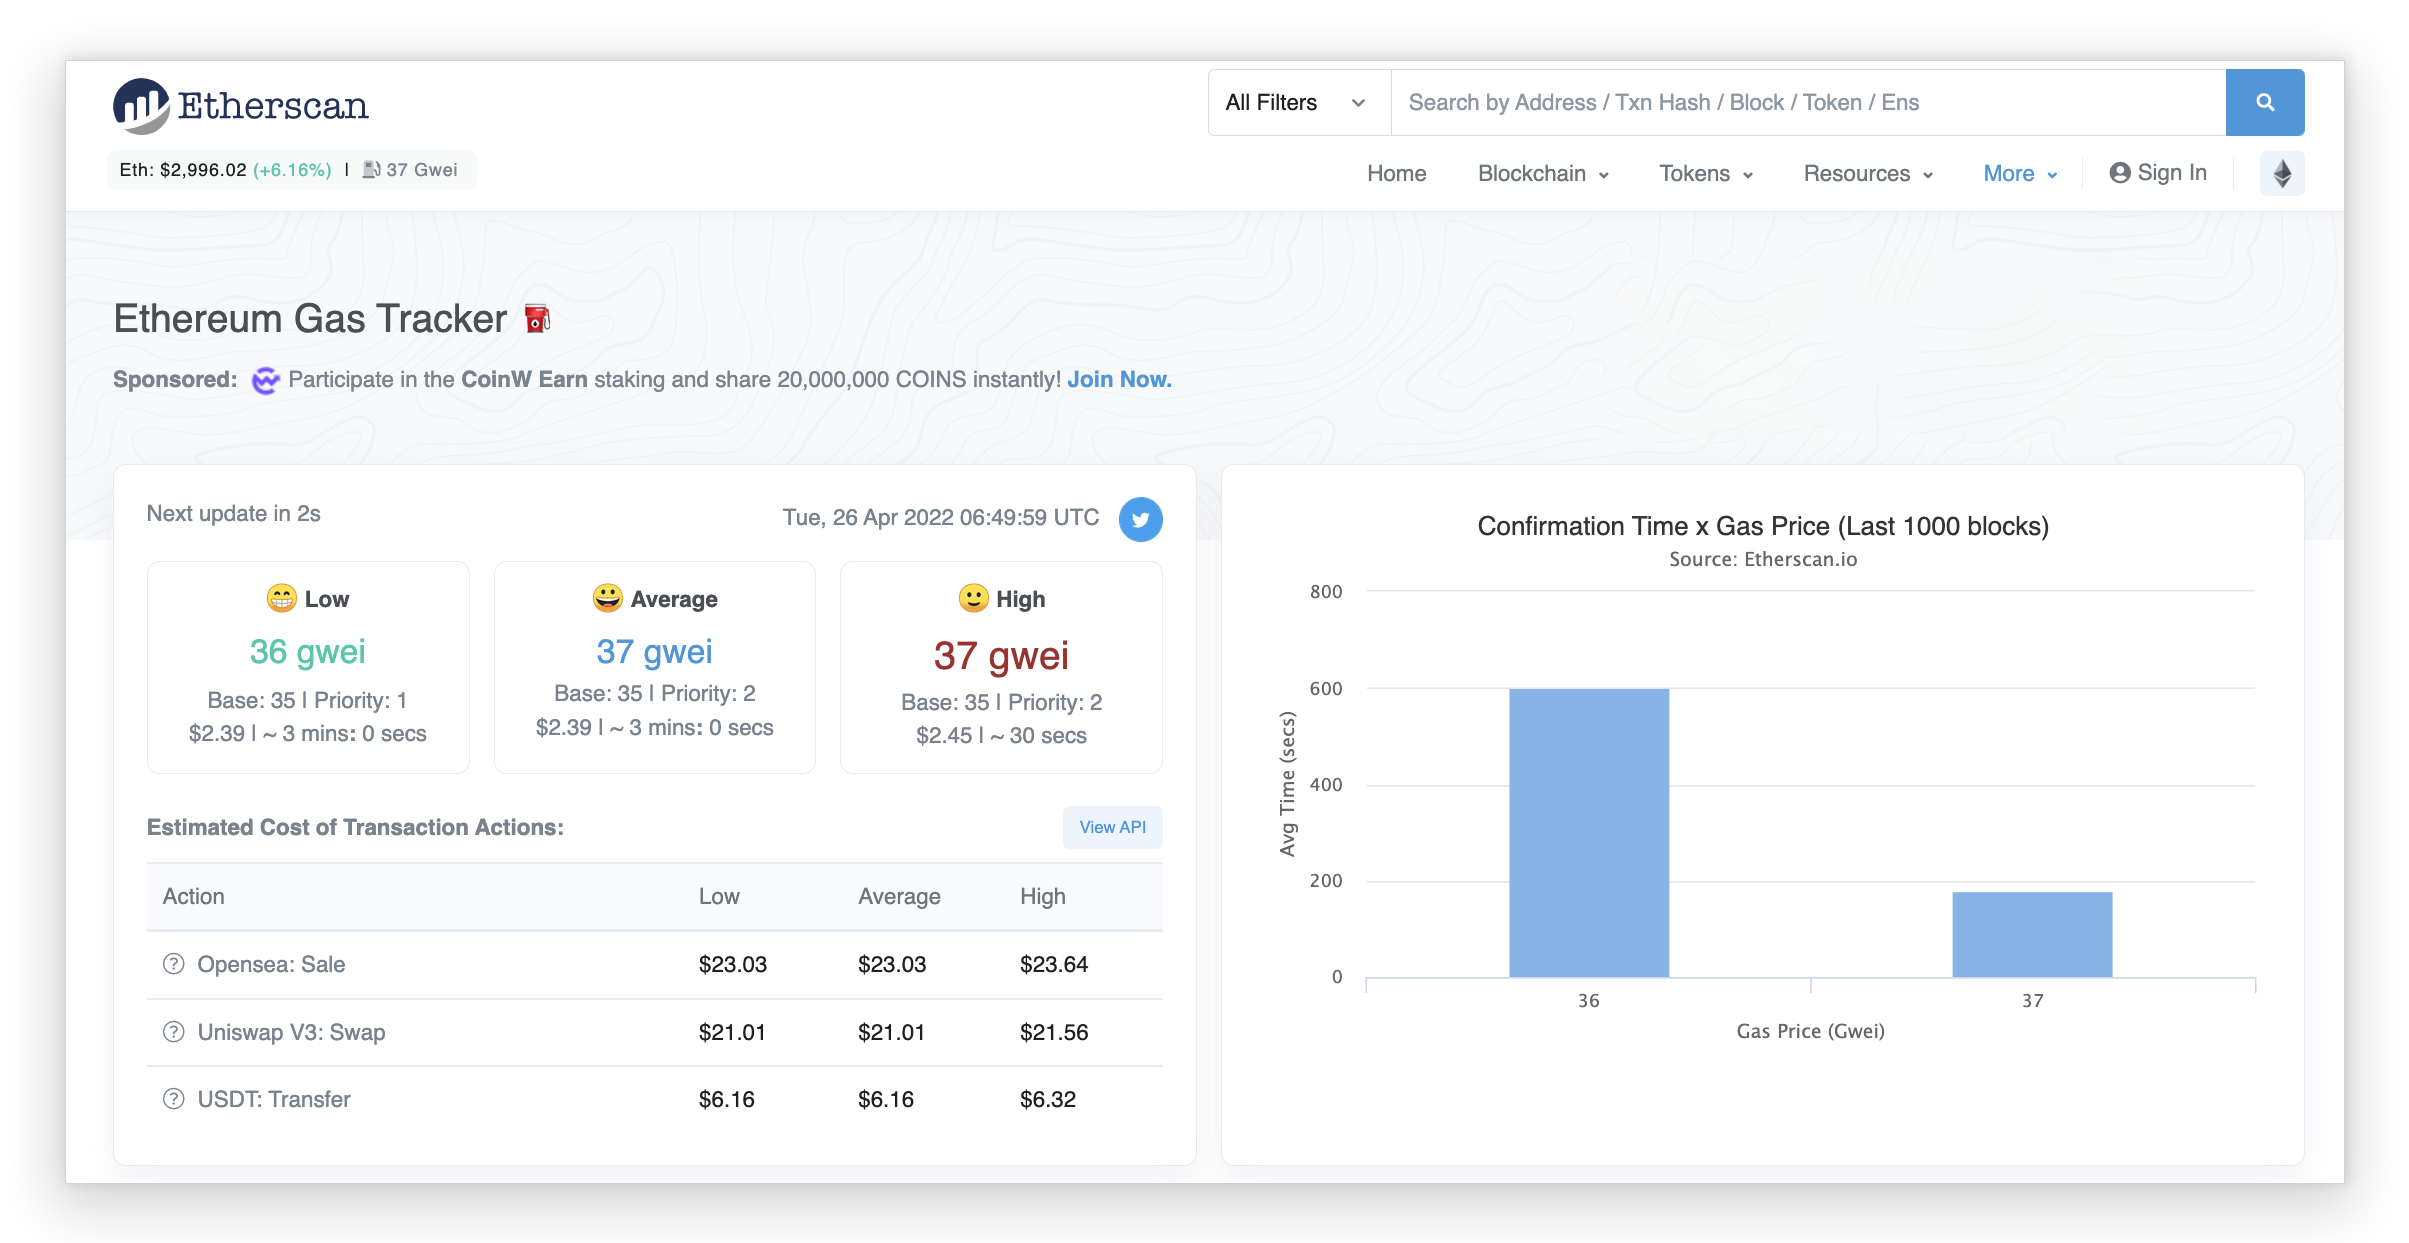
Tool #3: How to check gas prices on Etherscan ⛽
To check gas prices for a potential transaction, you can use Etherscan’s Gas Tracker feature. This tool helps predict network congestion and estimate how much it’ll cost you to conduct a transaction.
Gas is measured in ‘gwei,’ short for giga-Wei. Wei is the smallest unit of the Ethereum network, used by the Ethereum community to describe the fee charged for transacting on the Ethereum network.
To use Etherscan’s gas tracker:
- Take a look at the average cost of gas. Below that, you can view an estimated cost for transaction actions. The higher the price of gas, the faster the transaction will occur.
- Use this price of gas to inform your Ethereum purchases and transactions. There’s huge variation in the Ethereum network’s transaction costs, and you may want to hold off or speed up a transaction depending on the gas rates.
For example, in December 2021, the average gas price on the Ethereum network was 106 gwei, while at the time this article was written the average rate was in a range between 40-60 gwei.
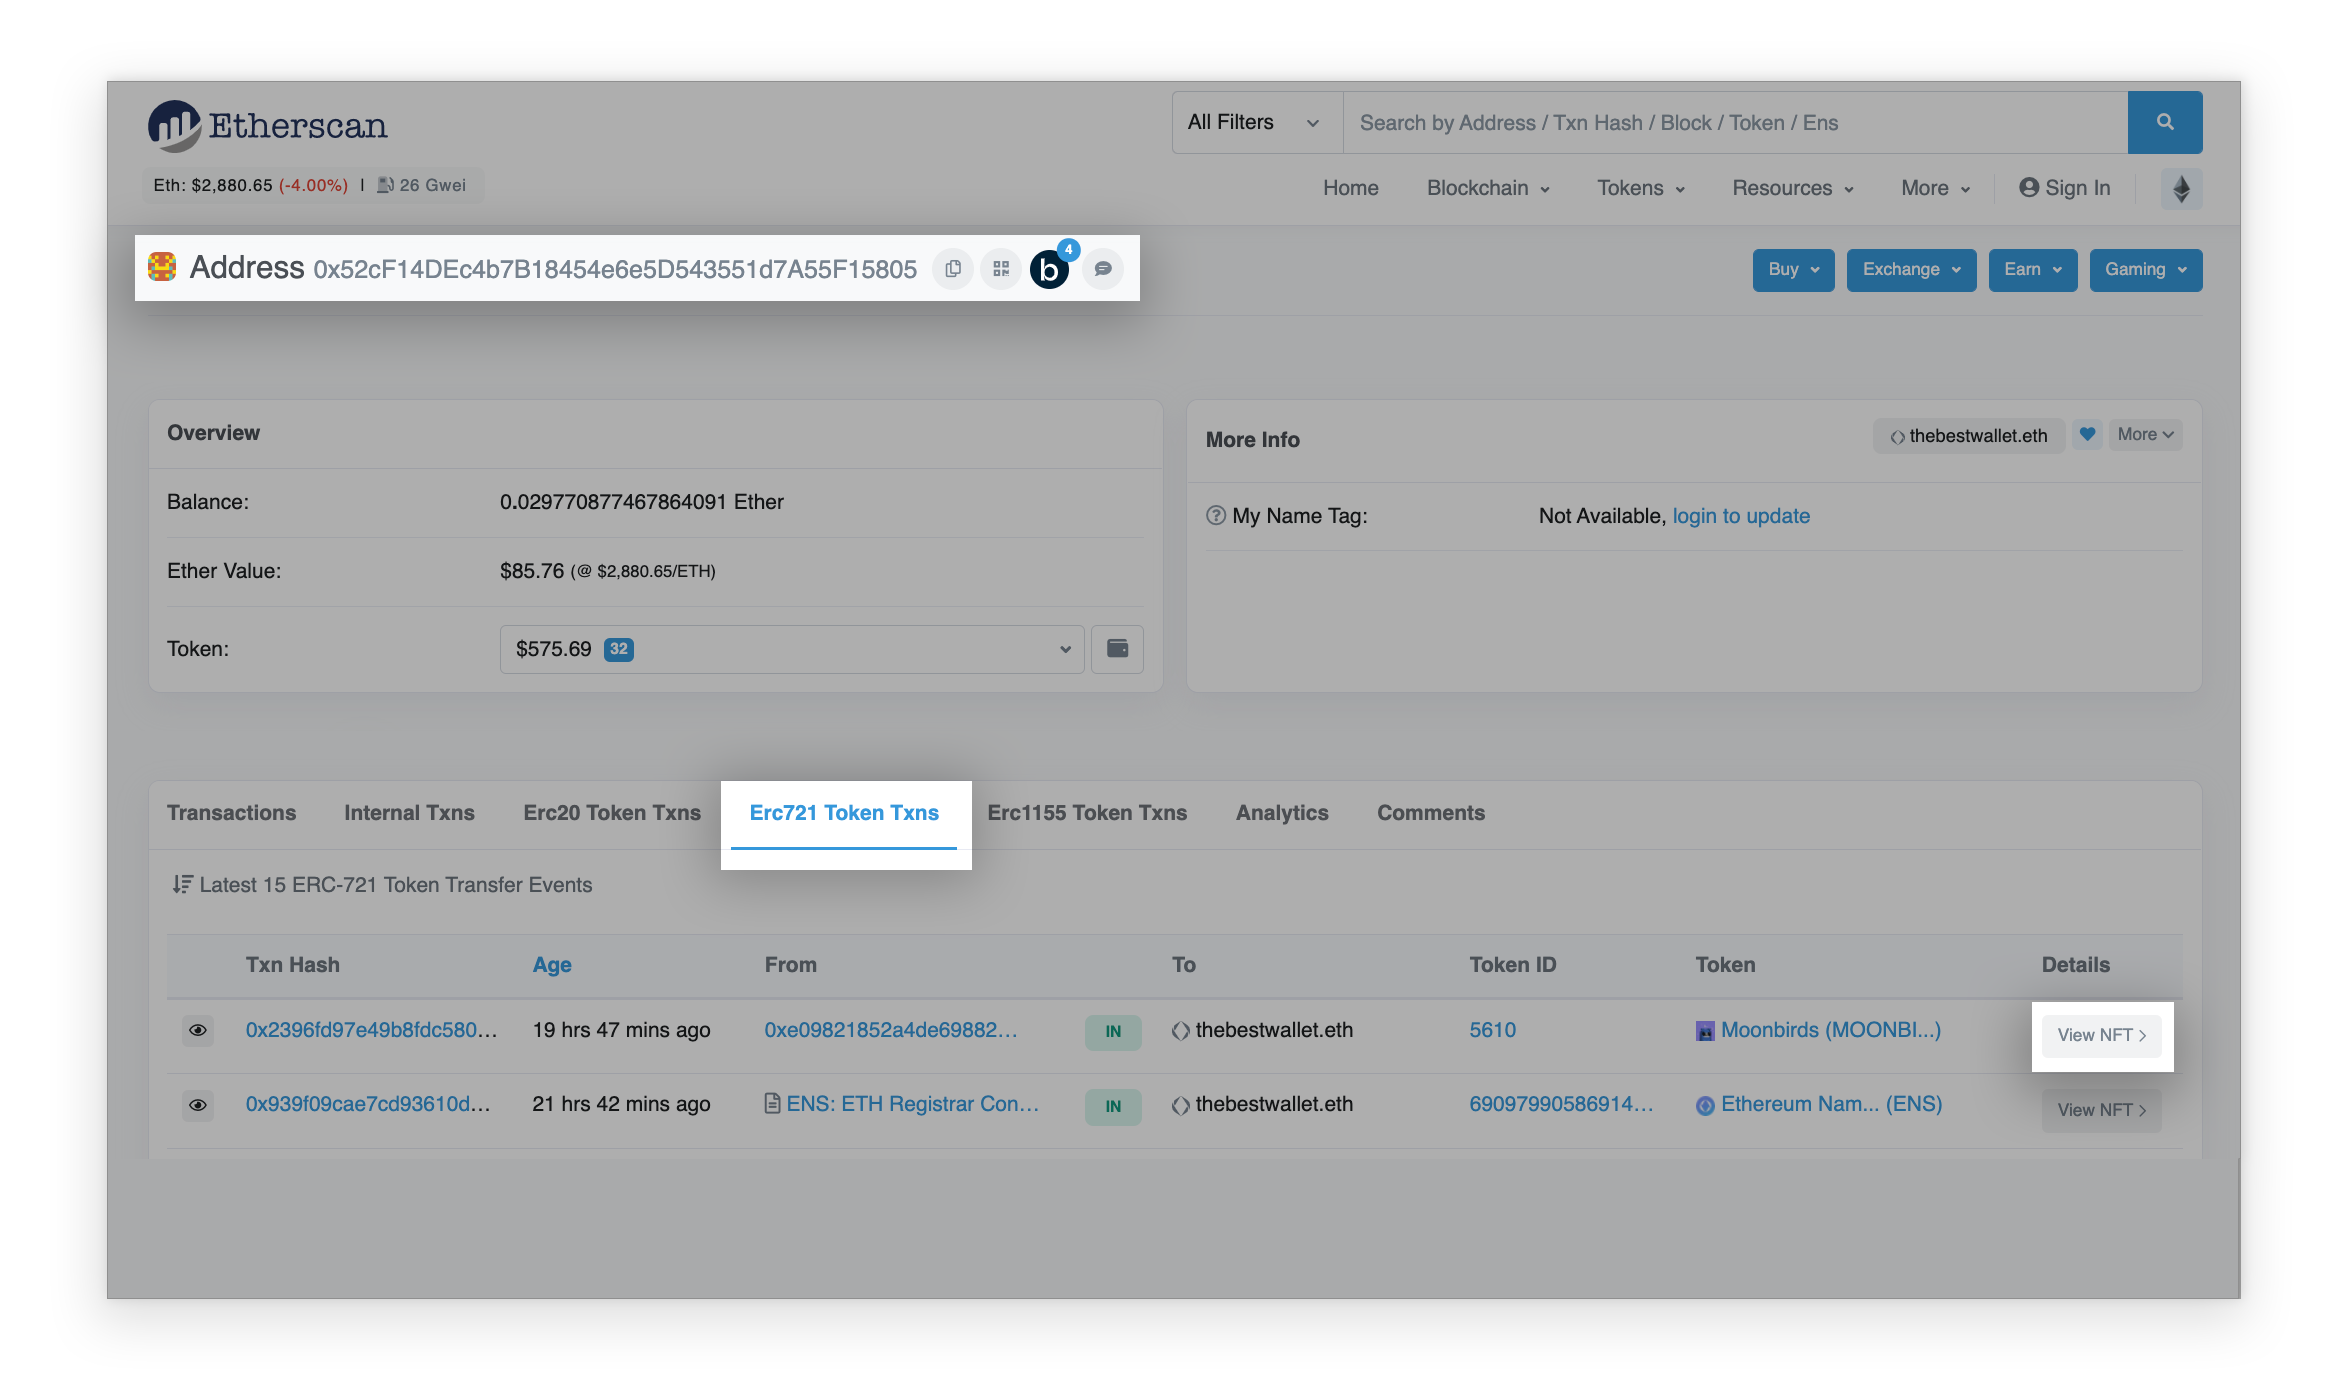
Tool #4: How to view your NFTs on Etherscan 🎆
In 2022 Etherscan released a feature to allow you to view NFTs directly in their platform. This release makes it easier to buy and sell digital collectibles for newbies, increasing transparency on NFT ownership and transactions. It’s also an easy way for you to view all your NFTs in one place.
To view your NFTs on Etherscan:
- Open the Etherscan homepage and in the search field at the top of the page, copy/paste in your wallet address and hit the ‘search’ icon.
- Midscreen (Transactions bar), click ‘Erc721 Token Txns’ and you’ll see a list of your NFTs.
You can go to the ‘Details’ column on the far right and click ‘View NFT>’ to view the NFT and its details and properties.
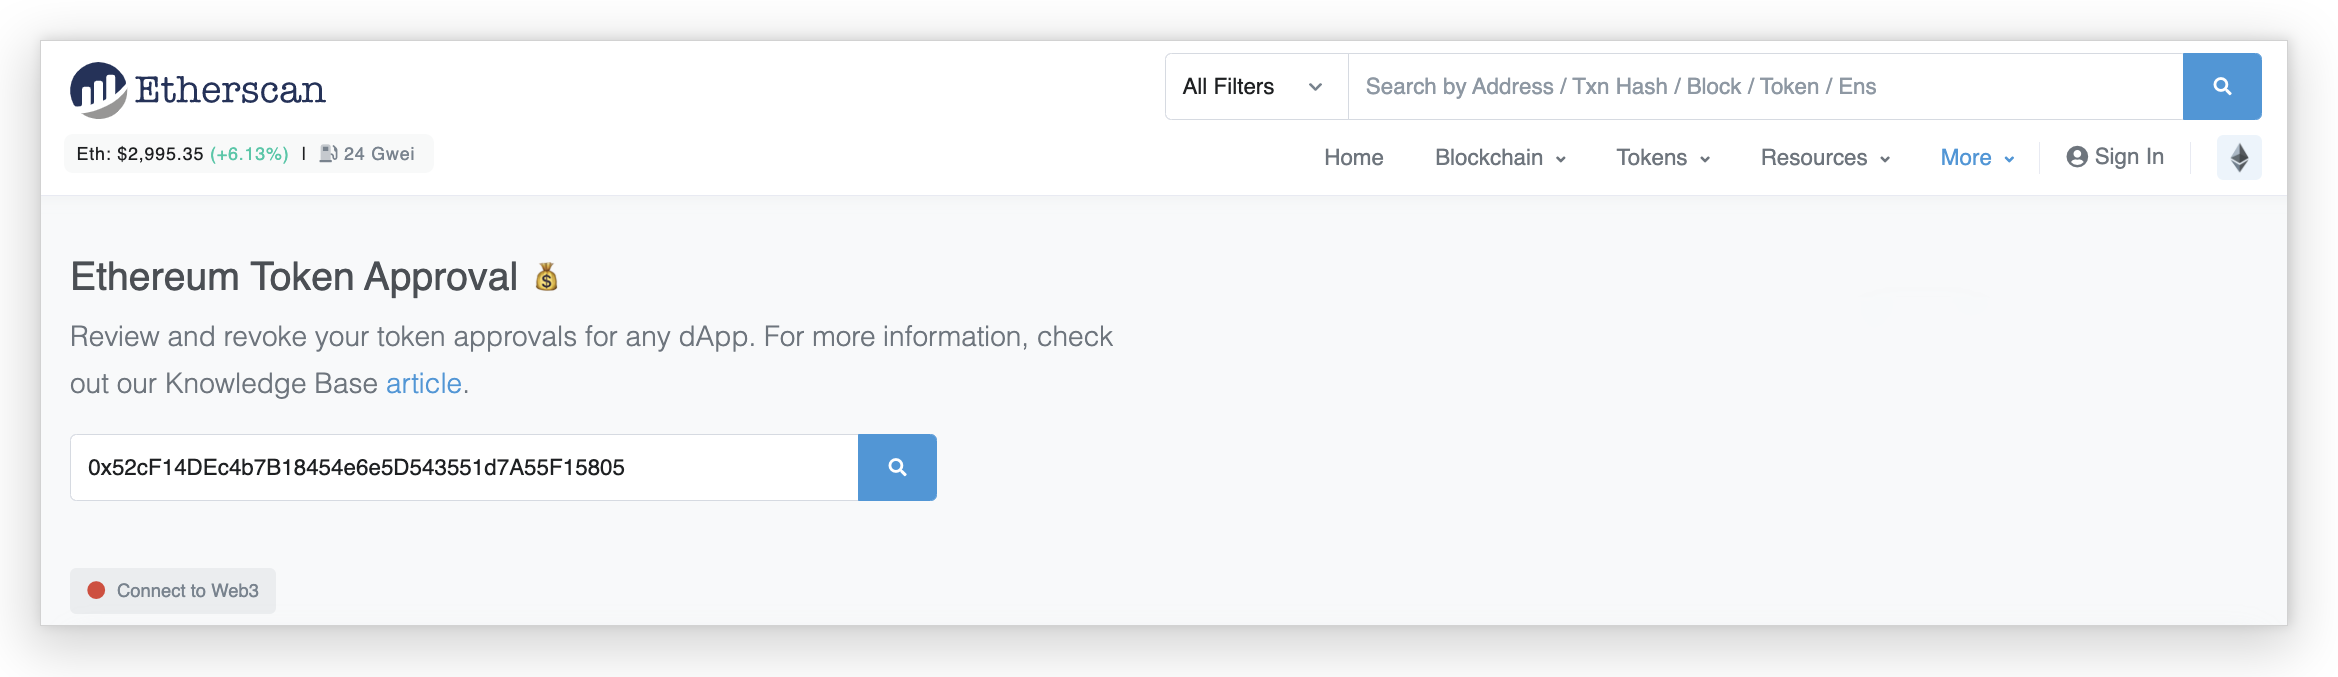
Tool #5: How to review and revoke your token approvals for any Dapp 🚫
When you interact with a Dapp (decentralized application), the Dapp gains access to your wallet. That’s why it’s really important that if you use Dapps, you’re cautious about which Dapps you grant access to.
And once you’ve granted a Dapp access, you can use Etherscan’s Token Approval Checker to review and revoke access to your wallet address. This is most relevant if you see any suspicious activity around that Dapp, or even think there’s a chance the Dapp has been compromised. Using this Etherscan feature, you’ll be able to block access from a specific Dapp. You can find more info on token approvals from the Etherscan team here.
To review and revoke your token approvals:
- Look up your wallet address on the Etherscan’s Token Approval Checker.
- Review the list of all approved smart contract interactions for that wallet.
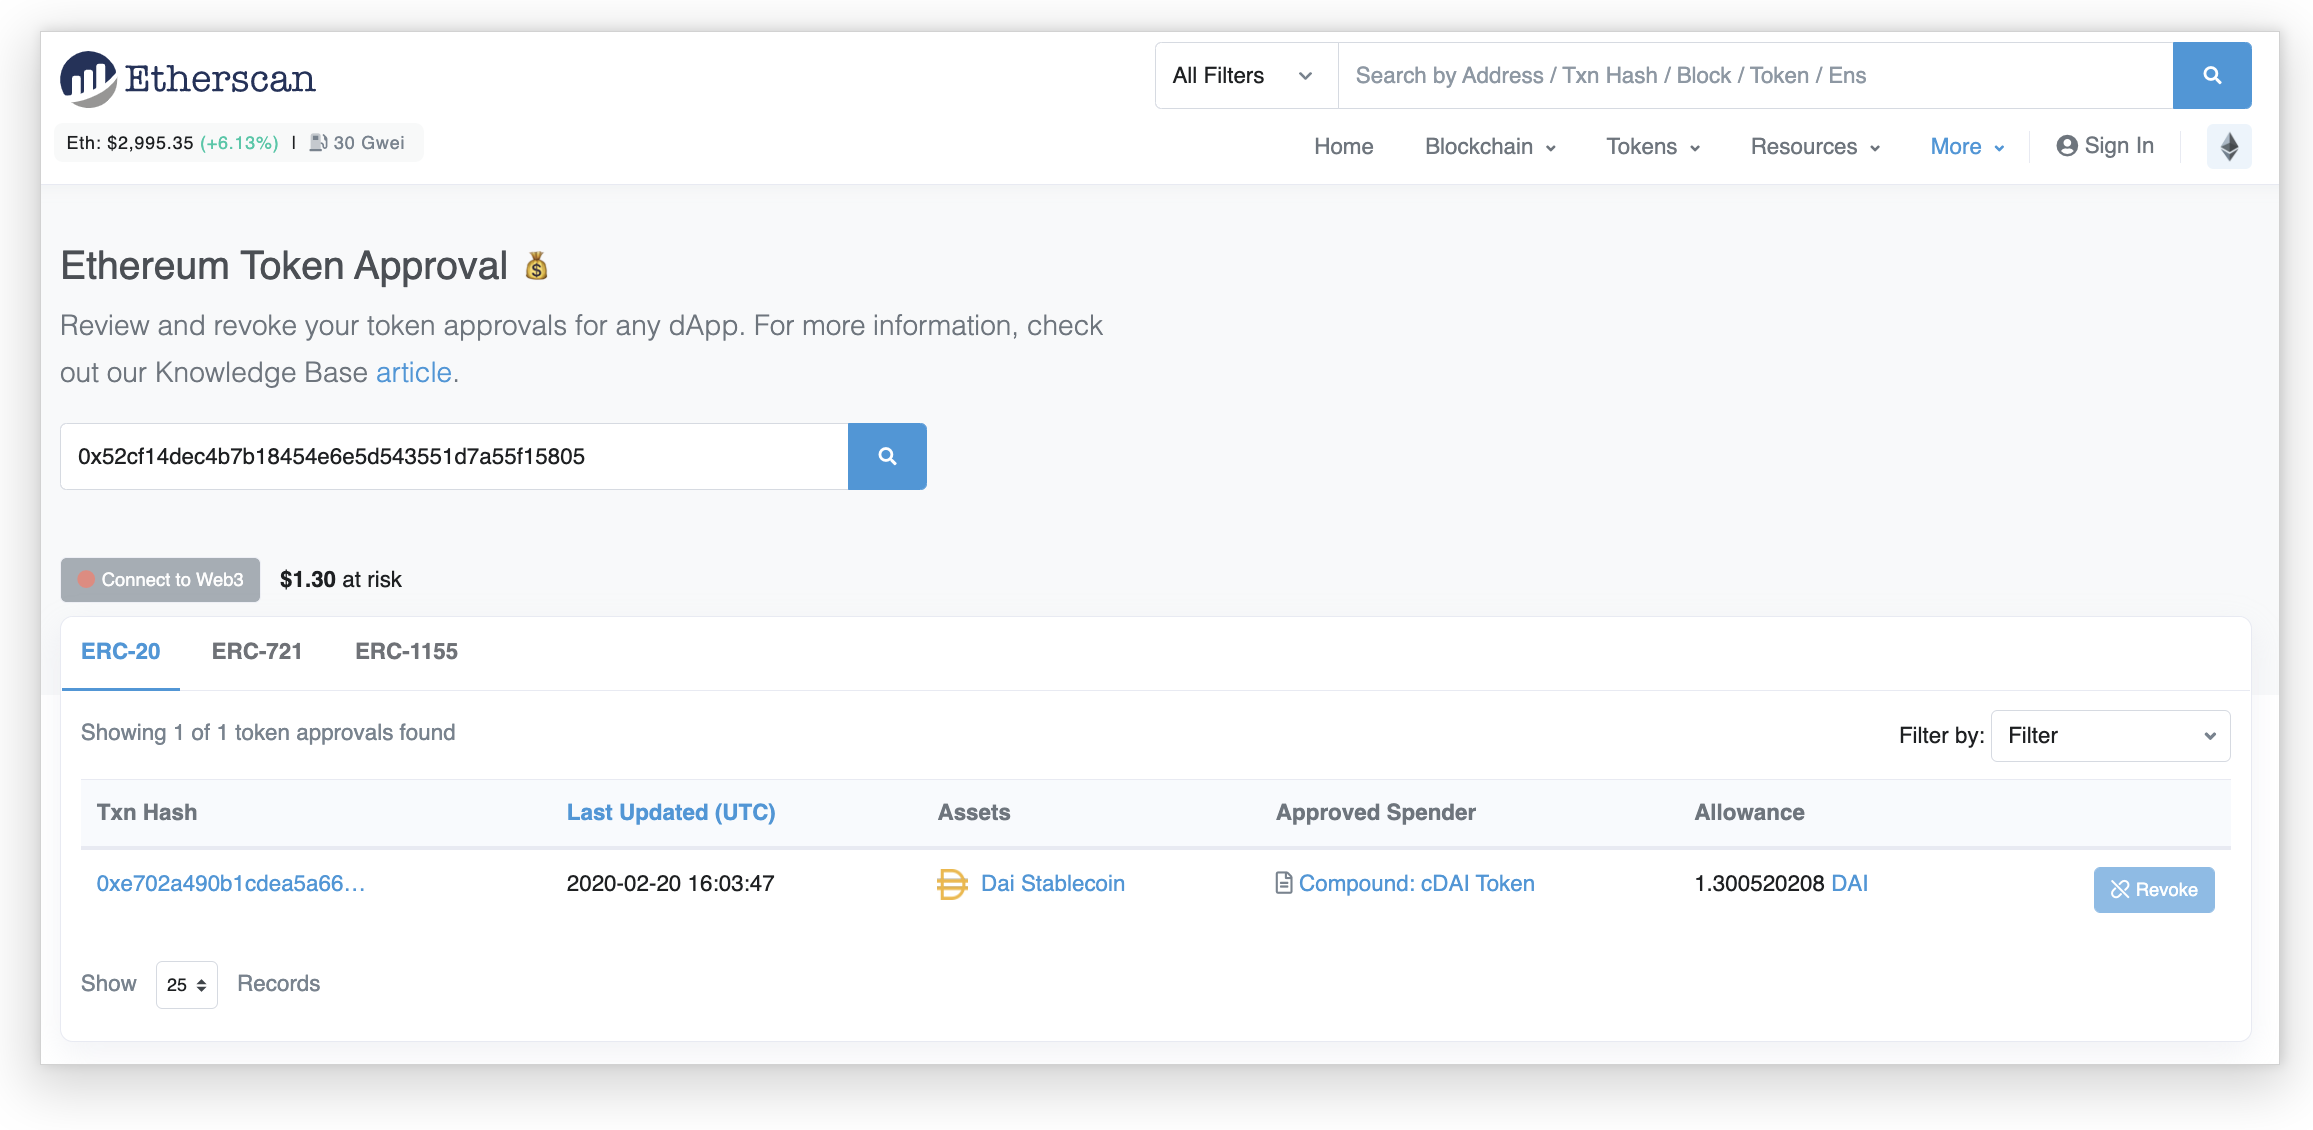
- Connect your wallet to Etherscan and click ‘revoke’ to ensure that a specific Dapp no longer has access to your wallet.
5 Fun Facts About Etherscan
- Etherscan has been around since 2015 and is one of the earliest and longest running independent projects built around Ethereum and its community 🙌
- Etherscan’s founding team is based in Kuala Lumpur, Malaysia 🇲🇾
- The Etherscan team is currently serving more than 5 million monthly users!
- Matthew Tan, the founder and CEO of Etherscan, has over 15 years of experience in the data/web applications solutions provider and blockchain space.
- There are no fees associated with using Etherscan!
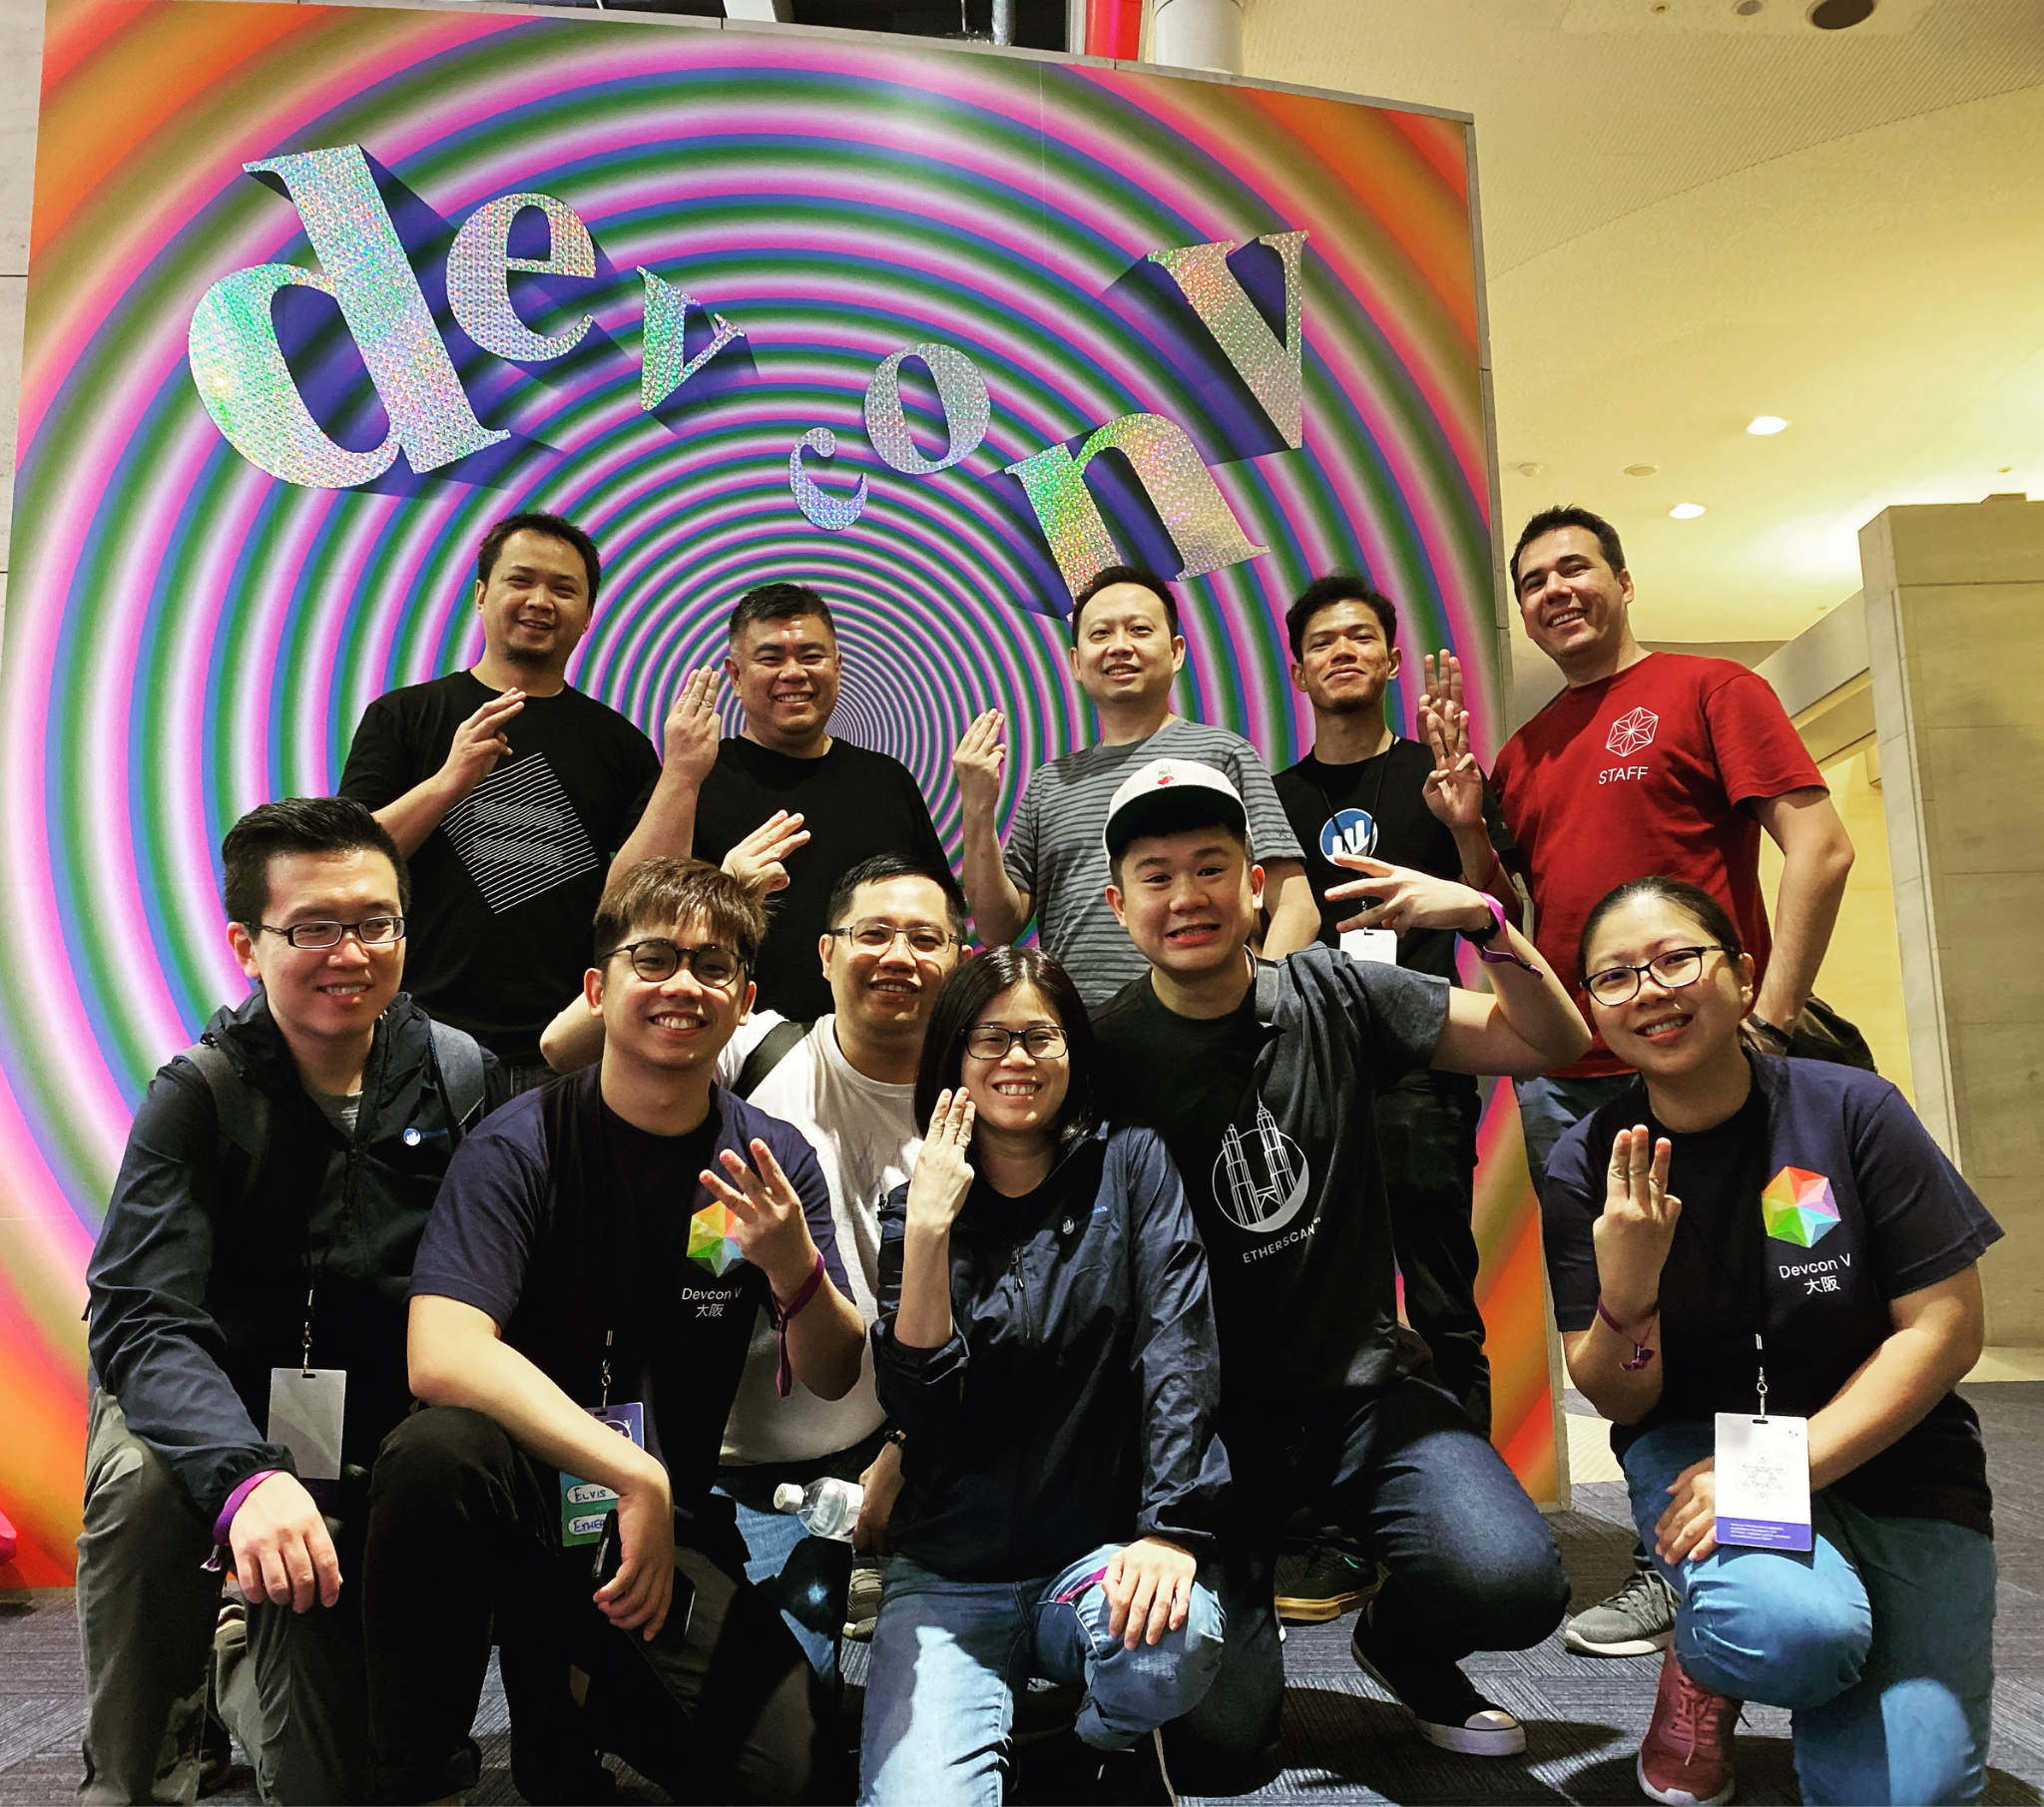
The Etherscan Team! 🙌
